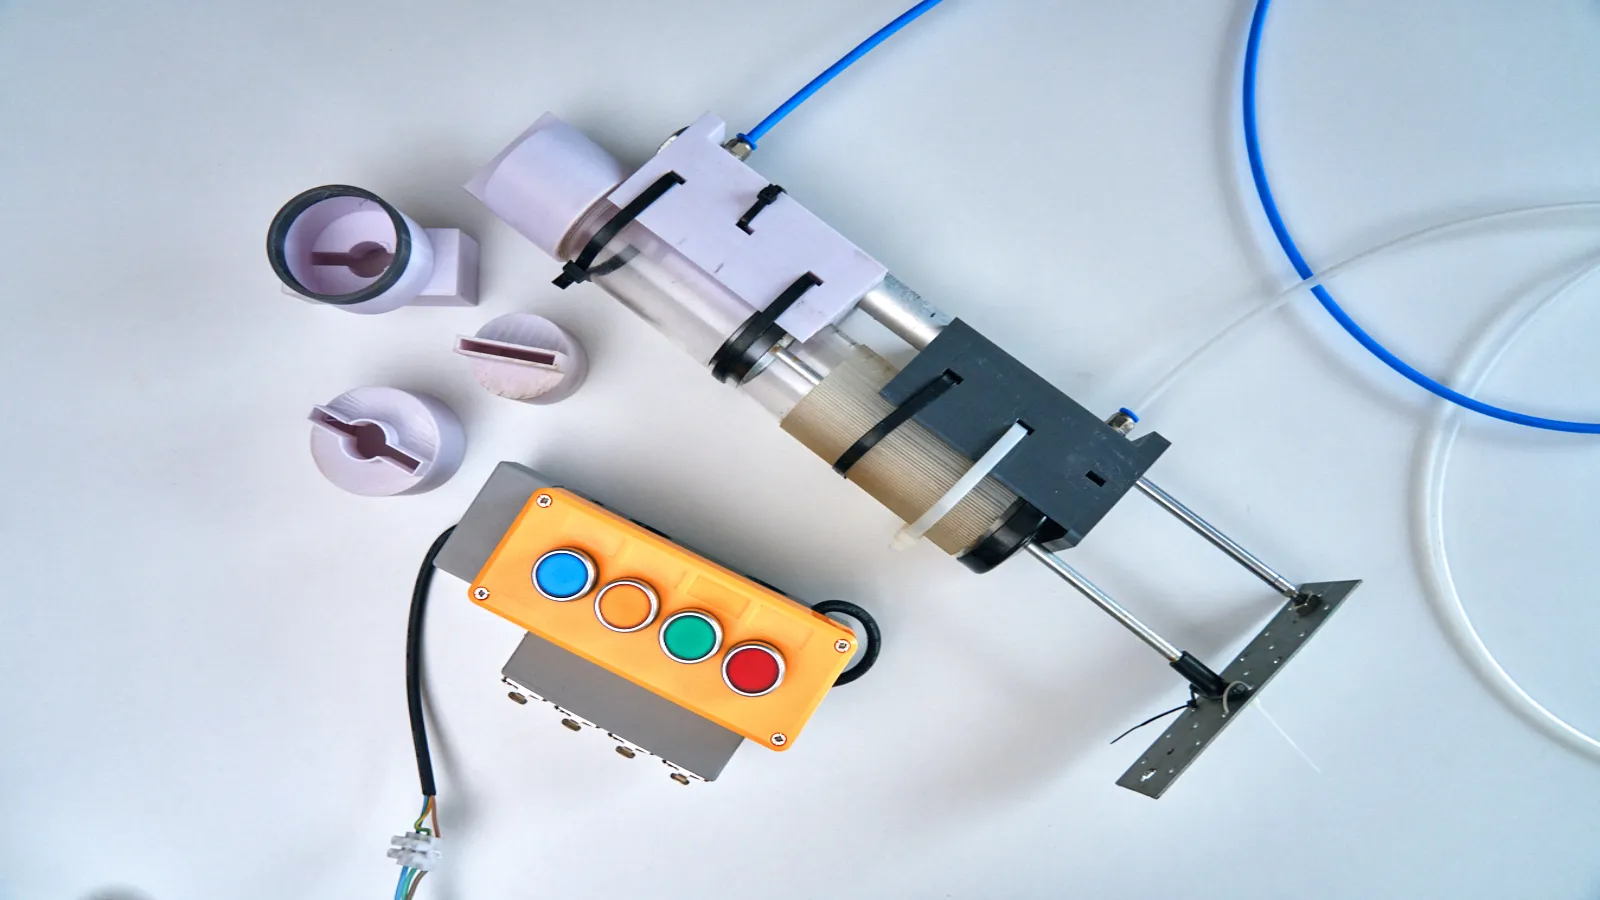
A pneumatic syringe splash rig is one of the most useful water rigs for controlled beverage splashes, liquid jets and repeatable slow-motion tabletop shots.If you have ever watched a drink commercial where a perfect liquid jet hits a product and creates a splash that hangs in the air, this is the type of rig behind that moment.
The idea is simple: a large syringe holds the liquid, a nozzle shapes the jet, and a pneumatic cylinder pushes the plunger. The pneumatic part exists because a human hand cannot repeat the same push with the same timing and speed take after take.
With a cylinder, you can control the pressure, timing and movement much more consistently.
This rig is not for slow pouring. It is for impact moments: a jet hitting a bottle, a splash wrapping around a glass, a sheet of liquid moving across frame, or two streams colliding in slow motion.
How a pneumatic syringe splash rig works
A pneumatic syringe splash rig uses a pneumatic cylinder to push liquid through a syringe and nozzle. The goal is not just to create a big splash, but to create a splash that can be repeated, adjusted and filmed safely in slow motion.
The rig has three main control points:
- the syringe volume
- the cylinder speed and pressure
- the shape of the nozzle tip
The syringe controls how much liquid is available. The pneumatic cylinder controls how quickly the liquid is pushed out. The nozzle tip controls the shape of the liquid as it leaves the syringe.
Change the pressure and the jet becomes faster or slower. Change the tip and the shape changes completely. Change the liquid and the splash behaves differently again.
This is why the rig is powerful. One basic setup can create many different effects if you can swap tips, adjust pressure and test the liquid properly.
What this rig does and does not do
The pneumatic syringe splash rig produces a controlled volume of liquid at a controlled speed and in a controlled shape.
It can create:
- fast liquid jets
- short splash bursts
- wide liquid sheets
- multi-stream effects
- controlled product impact splashes
- slow-motion beverage collisions
What it does not do well is pouring.
A pour is a slower, sustained stream. A syringe rig is a short, pressurized action. If you need a controlled coffee pour, bottle tilt or long stream into a glass, a gravity-fed tube, motorized tilt rig or separate pour system is usually a better choice.
Use the syringe rig when the visual moment depends on impact, speed and timing.
The right syringe: why the 550 ml oil-change type works
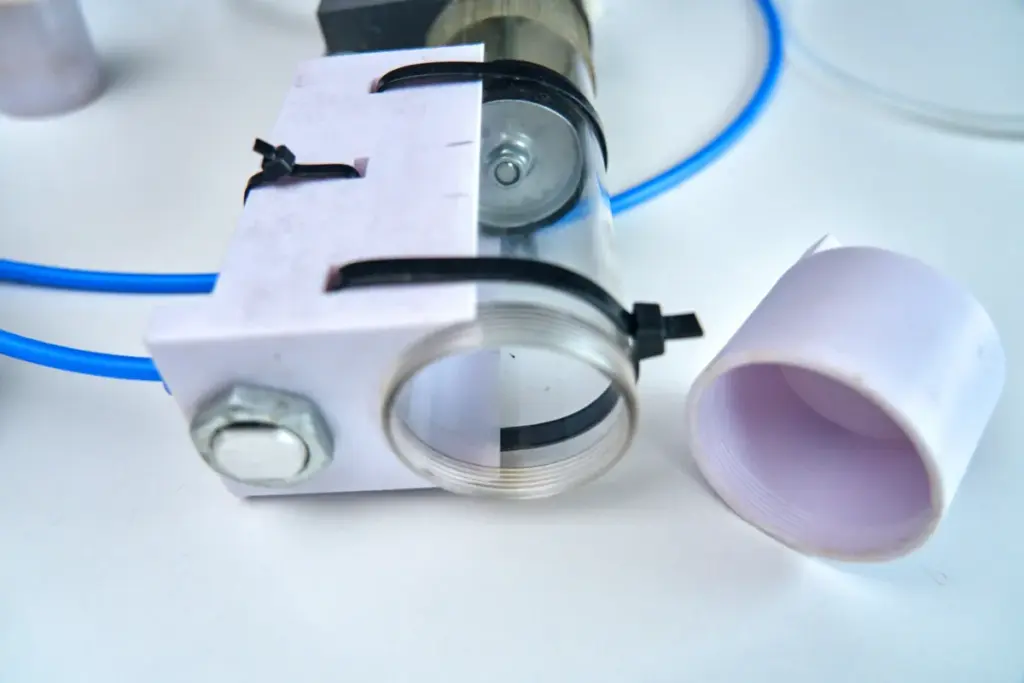
Not every syringe is useful for this rig.
The best starting point is usually a large automotive oil-change syringe, often around 550 ml. This size is large enough for most beverage splash shots but still small enough to mount, refill and reset between takes.
A single shot may use only 50–200 ml of liquid, so 550 ml gives enough working volume without becoming too heavy or awkward.
The most important detail is the front opening.
You want a syringe with a threaded or removable front nozzle. This allows you to attach different nozzle tips and change the shape of the jet. If the front is fixed or sealed, you are stuck with one output shape, and that makes the rig much less useful.
What to look for when buying the syringe
- around 550 ml capacity
- threaded or removable front nozzle
- solid plunger construction
- body strong enough to handle repeated pressure
- front opening suitable for custom nozzle adapters
Avoid syringes with a sealed front, fixed tip or one-piece nozzle. You can sometimes modify them, but it is messy and rarely worth the time. It is better to start with a syringe designed for interchangeable tips.
Why threaded nozzles matter
The nozzle is the biggest creative control point in the rig.
A narrow nozzle creates a fast, focused jet. A wider nozzle creates a thicker stream. A slit-shaped nozzle creates a sheet of liquid. Several small holes create multiple thin streams.
If the syringe has a threaded front, you can swap these tips quickly. That means the same syringe and cylinder can produce completely different splash shapes.
This is where 3D printing becomes very useful. You can print several nozzle shapes, test them with water, and choose the one that creates the best result for the shot.
The nozzle does not need to be complicated. It needs to be repeatable, sealed properly and strong enough not to crack during firing.
The four nozzle shapes to start with
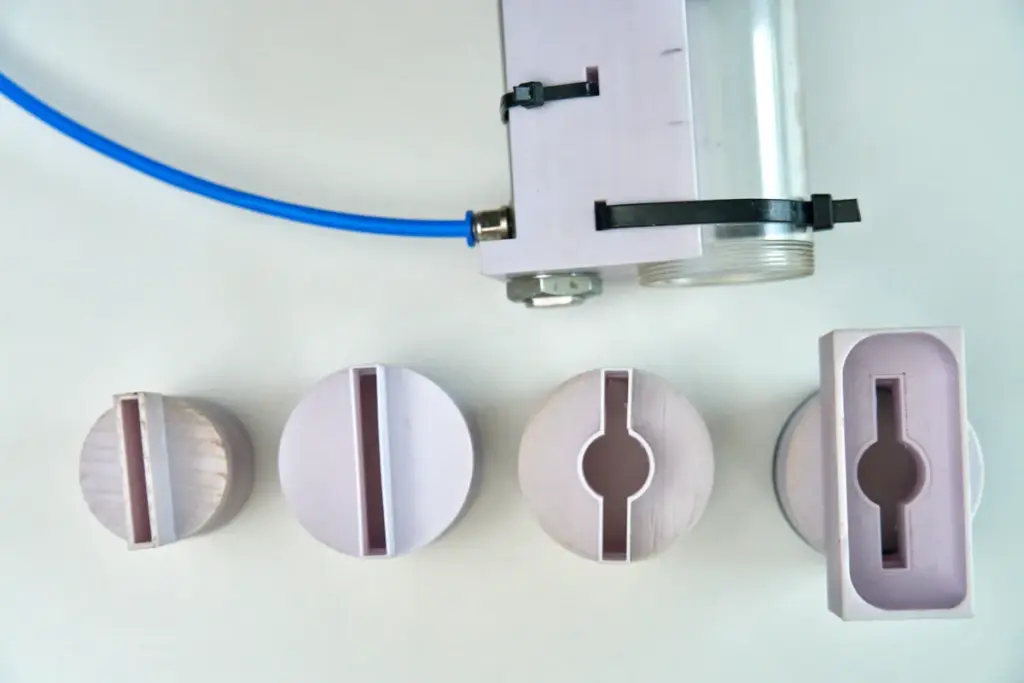
You do not need twenty different nozzles at the beginning. Start with four basic shapes.
1. Narrow jet
A single small hole, around 3–5 mm, creates a fast and focused jet.
This is useful when you want liquid to hit a specific point, such as a piece of fruit, a bottle, a can or a small product area. The jet stays more defined in flight, so it is easier to aim.
2. Wide jet
A larger single hole, around 8–12 mm, creates a thicker stream.
This is useful when the target is larger or when you want a more diffused splash. The shape is less precise than a narrow jet, but it can create a stronger visual impact.
3. Sheet tip
A slit-shaped opening creates a wide sheet of liquid.
This is useful for product reveal shots, liquid curtains or moments where the water needs to sweep across a wider area. A sheet tip can look very cinematic in slow motion, but it needs careful testing because the sheet can break unevenly.
4. Multi-stream tip
Several small holes create multiple thin streams.
This can add texture and complexity to a splash. Instead of one clean jet, you get several lines of liquid that break into droplets and create more visual detail.
Print or prepare these four shapes first. Test each one with plain water against a simple background before using hero liquid or a final product setup.
Cylinder sizing for the syringe rig
The pneumatic cylinder pushes the syringe plunger.
For a 550 ml syringe, a 20×200 cylinder is a good starting point. That means 20 mm bore and 200 mm stroke.
This size gives enough force for many water-like liquids and enough travel to push a useful amount of liquid through the syringe. It is also a size that can be reused in other rigs, such as slide drops, release systems and small launchers.
For thicker liquids, faster jets or larger syringes, you may need to move up to a 25 mm or 32 mm bore cylinder. More bore gives more force, but it can also make the rig more aggressive.
Start with the smallest setup that works. Increase force only when the liquid, nozzle or plunger resistance requires it.
When 20×200 is enough
- water
- milk-like liquids
- thin juice
- small to medium splash bursts
- narrow or medium nozzles
When to move up
- thicker liquids
- wider nozzles
- larger splash volume
- faster jet speed
- plunger resistance is too high
The cylinder rod needs to connect to the syringe plunger securely. A loose or angled connection can make the plunger wobble, and that changes the jet shape from take to take.
Mounting the syringe properly
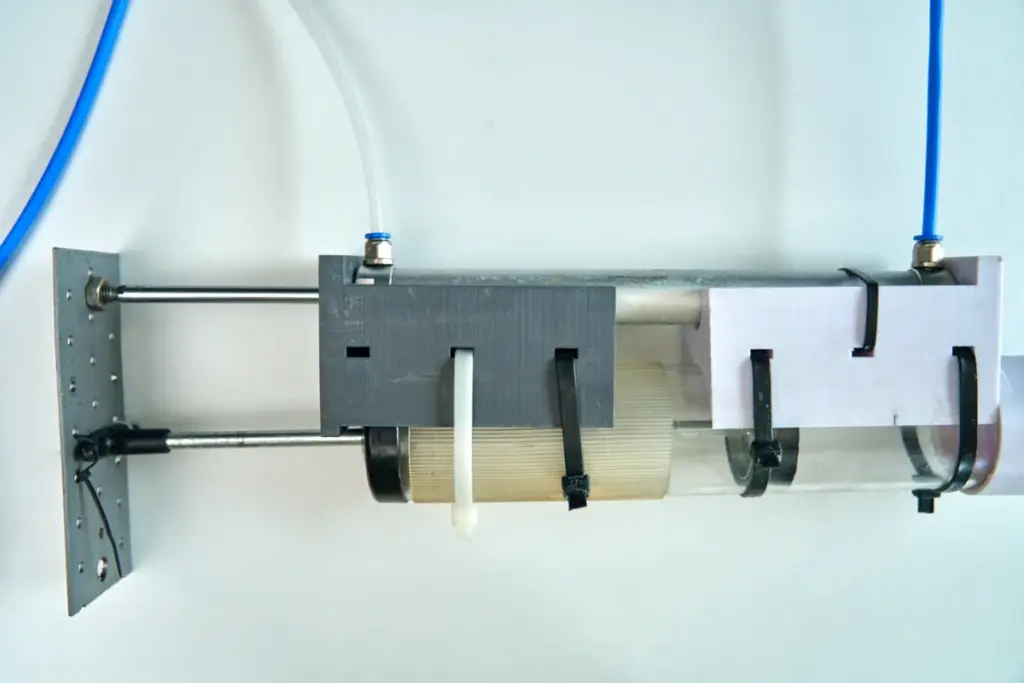
The syringe must be held firmly.
If the syringe body shifts during firing, the jet direction changes. Even a small rotation can ruin the shot because the liquid misses the target or hits the product at a different angle.
For testing, zip ties can help you prototype. For a real shoot, use a rigid clamp or custom holder.
A solid mounting setup can include:
- a clamp around the syringe body
- a rigid 3D printed or metal bracket
- 20×20 aluminium profile or a strong base rail
- a fixed cylinder mount behind the syringe
- a rod adapter connecting the cylinder to the plunger
- a base plate or table clamp to keep the whole rig stable
The syringe and cylinder should be aligned. The cylinder rod should push straight into the plunger, not at an angle. If the rod pushes off-axis, the syringe may bind, leak, wobble or create inconsistent pressure.
Working angle and liquid feed
The angle of the syringe matters.
A completely flat horizontal position can sometimes trap air near the front of the syringe, which causes sputtering. A slight angle helps the liquid feed more reliably and makes it easier to remove air pockets.
Even five to ten degrees can help.
The best angle depends on the shot. You may fire straight forward, slightly up, slightly down or from above. But whatever angle you choose, the syringe must stay fixed and the liquid must feed cleanly into the nozzle.
If the jet sputters or breaks apart unexpectedly, check for air inside the syringe before changing the whole rig.
Test liquid progression
Always start with plain water.
Water lets you test the mechanical system, nozzle shape, aim, pressure and leaks without wasting expensive liquid or creating unnecessary cleanup.
After water, move to a cheap liquid that behaves more like the final product. If the final shot uses milk, test with watered-down milk. If the final shot uses coffee, test with weaker coffee. If the final shot uses juice, test with water and food coloring.
Use the hero liquid last, when the rig is already dialed in.
The order should be:
- plain water
- cheap similar liquid
- final hero liquid
This workflow saves money and keeps the session under control.
Thick liquids need separate testing
Thick liquids behave very differently from water.
Chocolate sauce, honey, syrup, thick cream or dense sauces may need more pressure, a wider nozzle, a larger cylinder or a completely different rig design.
A nozzle that works beautifully with water may clog or sputter with chocolate. A pressure setting that creates a clean milk splash may barely move a thick sauce.
Do not assume one calibration works for every liquid.
If the project involves thick liquids, plan extra testing time. Treat the liquid as part of the rig, not just something you pour into it.
Common mistakes
Buying the wrong syringe
A sealed-front syringe limits the entire rig. Without a removable nozzle, you cannot easily change the jet shape. Always check the front opening before buying.
Skipping the pressure regulator
The regulator controls how aggressive the cylinder movement is. Without it, the cylinder can fire too hard, shake the rig or damage parts.For better long-term rigging practice, it helps to understand basic pneumatic components such as cylinders, regulators and valves from industrial suppliers like Festo.
Mounting the syringe too loosely
If the syringe moves during firing, every take is different. A proper clamp is worth the time.
Using too much pressure
More pressure does not always mean a better splash. Too much pressure can break up the jet, create chaos, or make the liquid miss the target.
Leaving air inside the syringe
Air pockets cause sputtering. Fill carefully, tilt the syringe as needed, and push out trapped air before testing.
Testing with hero liquid first
Most first tests fail for mechanical reasons. Use water until the rig works reliably.
Five shot variations
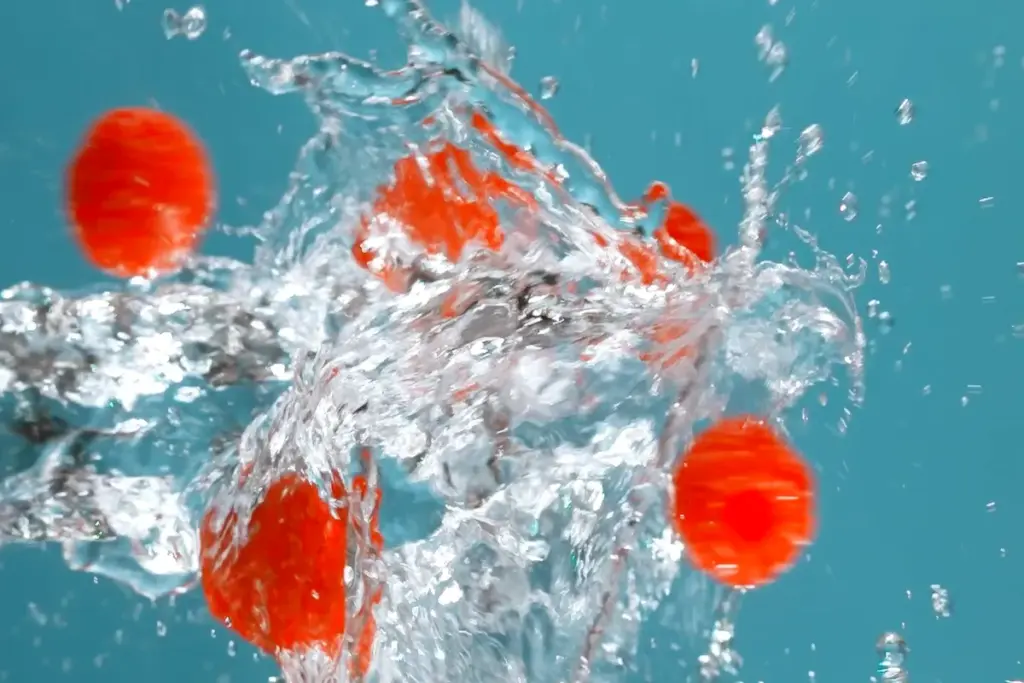
Once the rig is calibrated, the same base setup can create many different liquid effects.
Classic beverage splash
Place the product upright and fire a liquid jet from one side. Backlight the droplets and adjust the nozzle until the splash wraps around the product.
Mid-air collision
Use two syringe rigs facing each other. Fire both streams into the same point so they collide in mid-air. This is harder to time, but it can create a dramatic slow-motion effect.
Product reveal sweep
Use a sheet tip to send a wide liquid shape across the frame. This can reveal a bottle, glass, cosmetic product or package behind the liquid.
Texture jet
Use a multi-stream tip to create several thin liquid lines. This works well for texture inside glasses, bowls or background splash elements.
Slow-motion sheet drop
Mount the sheet tip higher and fire downward. In slow motion, the sheet breaks into droplets as it falls, creating a soft atmospheric water effect.
FAQ
Can I use this rig for thick liquids like honey or syrup?
Sometimes, but not with the same settings as water. Thick liquids need wider openings, more force and more testing. Honey is especially difficult and may require a different rig design.
How fast can I repeat shots?
The refill is usually the slowest part. With a large syringe, resetting can take around 30–60 seconds depending on cleanup, refill method and how carefully you need to remove air.
Do I need a controller?
No, not for one syringe. A simple push button can trigger the solenoid. A controller becomes useful when you want two syringes firing together or when the syringe must sync with another rig.
Why does the jet sputter?
Most of the time, sputtering comes from trapped air inside the syringe or a loose nozzle seal. Check air pockets first, then check the threaded tip and fittings.
Can I use 3D printed nozzle tips?
Yes. 3D printed tips are one of the easiest ways to test different jet shapes. Make sure the print is strong enough, sealed properly and compatible with the syringe thread or adapter.
Where to go from here
If you are still starting with water rigs, read the guide on where to start with tabletop water rigs.
The pneumatic side of this rig uses the same basic logic as air rigs. If you need the foundation first, read the guide on beginner air rig setup.
For the bigger picture of the whole system, start with what tabletop rigging is.
The course covers this rig in Module 2, including nozzle shapes, cylinder sizing, mounting references, thick liquid calibration and selected 3D-printable files where available. The waitlist is open.
A pneumatic syringe splash rig is powerful because it turns a messy liquid effect into a repeatable mechanical action. Start with water, test one nozzle at a time, keep the syringe firmly mounted, and only move to hero liquid when the rig is already under control.