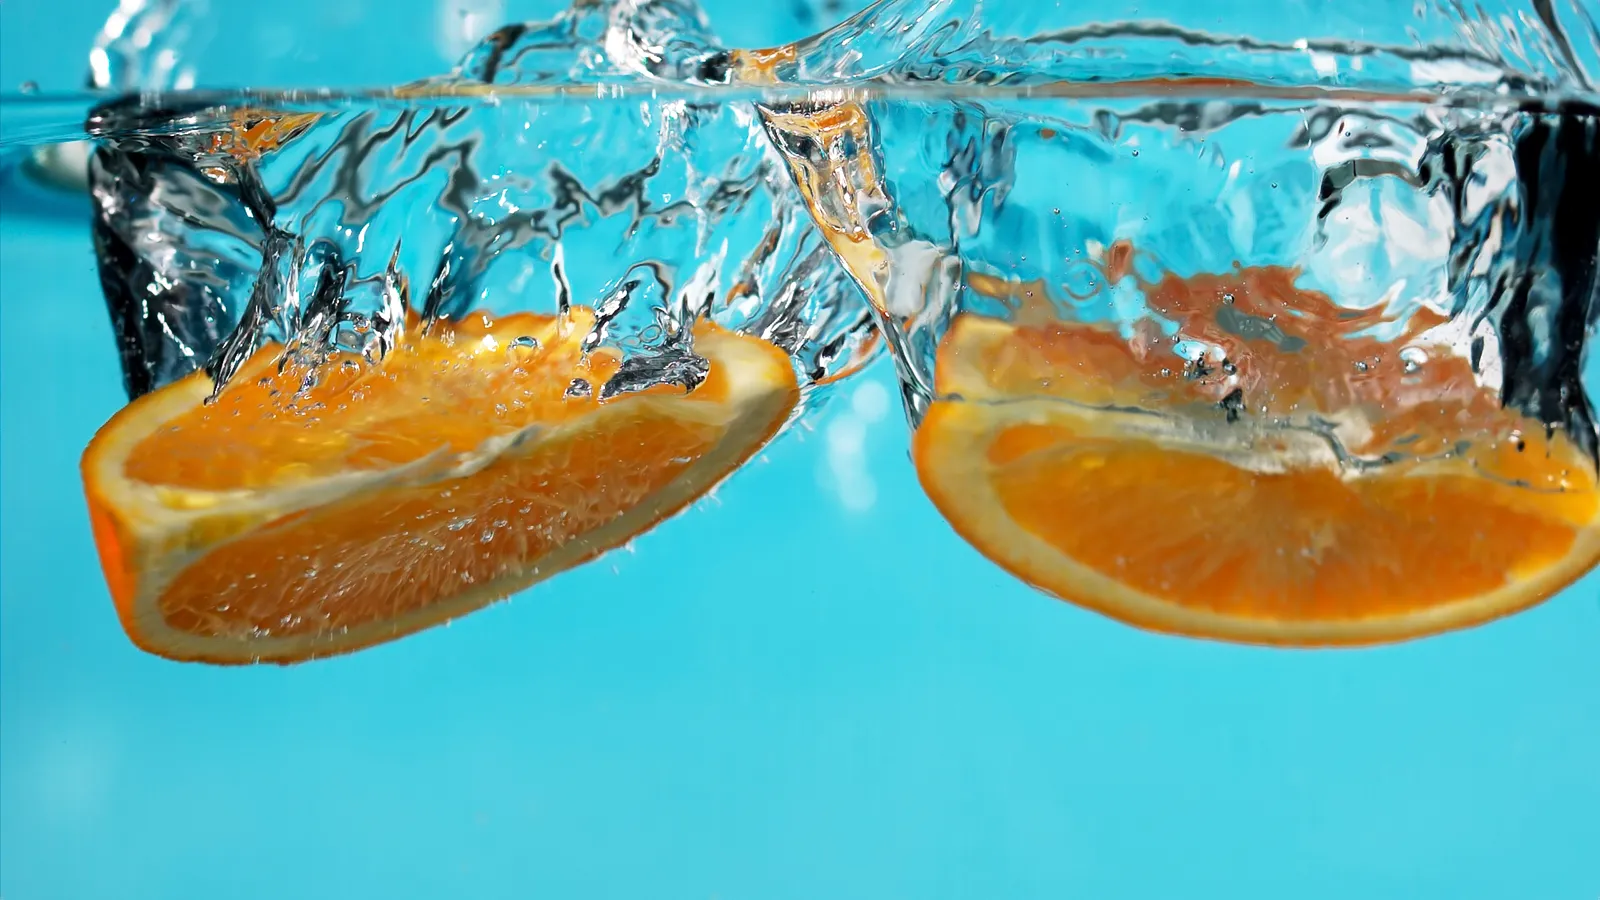
A tabletop water rig can create some of the most beautiful shots in food and beverage filmmaking: fruit hitting milk, bubbles rising behind a product, liquid pouring through frame, or a bottle reveal inside moving water.
Water rigs look magical when they work. They are also one of the easiest rig categories to overspend on too early.
Beginners often think they need a custom tank, special glass, expensive pumps, complex nozzles and a large waterproof setup before they can shoot anything useful. In reality, many of the first tests can be done with a small aquarium, a basic pump, clear tubing, air stones and careful lighting.
The goal at the beginning is not to build the most impressive water rig. The goal is to learn how water behaves on camera before you spend money on custom equipment.A good tabletop water rig starts simple, stays safe, and helps you understand the shot before you build anything custom.
Tabletop water rig basics: where to start
Water rigs are different from pneumatic rigs and motion-control rigs because the medium itself is unpredictable.
A pneumatic cylinder moves in a direction. A stepper motor follows a path. Water does not behave that cleanly. It spills sideways, drips from edges, splashes higher than expected, sticks to glass, catches reflections, and finds every small gap in the setup.
This is why a beginner tabletop water rig should be simple, visible and easy to reset.
Before building custom tanks or complicated splash systems, start with three things:
- a small ready-made aquarium
- a simple bubble setup
- plain water tests before using any hero liquid
These three teach more than an expensive custom build at the beginning.
Safety around water rigs
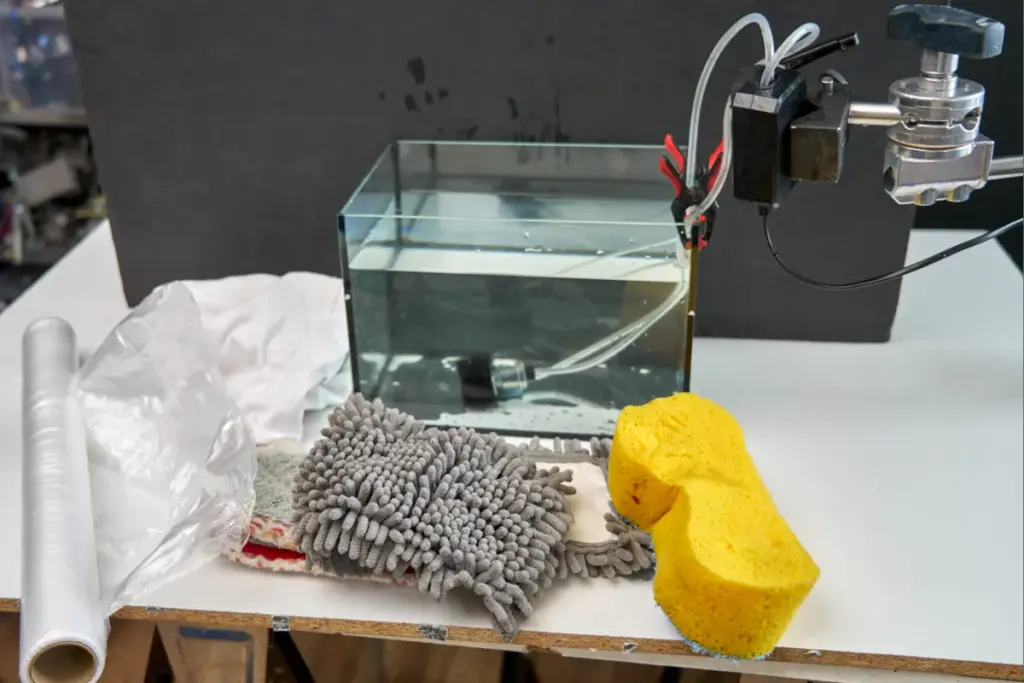
Water and electricity must be kept apart on set.
Before building any water rig, get into the habit of placing electrical equipment away from the splash zone. Power supplies, controllers, motor drivers, laptop chargers, lights and extension cables should not sit next to the tank edge or on the floor where water can reach them.
Keep power strips elevated or far away from the wet side of the set. Do not let cables hang into the tank area. Do not put unprotected electronics at splash height. Test with plain water first so you learn where the liquid actually goes.
If you do regular water work, a residual-current device, also known as an RCD, is a good safety upgrade for the workspace. It is not expensive and gives an extra layer of protection.
The simple rule is:
Water stays on one side. Electricity stays on the other side.
Why water rigs are harder than they look
Water rigs are not always mechanically complicated, but they are visually sensitive.
With air rigs, success is often easy to judge. Did the cylinder move? Did the food drop? Did the plate release cleanly?
With water rigs, success is more aesthetic. Did the splash look beautiful? Are the bubbles the right size? Is the liquid clear enough? Is the glass tint affecting the product? Are reflections ruining the shot? Is the container visible in a bad way?
This makes water rigging harder to evaluate at the beginning.
A water rig also includes the container as part of the image. With a pneumatic rig, the camera mostly sees the food and maybe the rig. With a water rig, the camera also sees the glass, acrylic, silicone seams, scratches, reflections, tint and distortion.
The container is not just holding water. It is part of the optical system.
Do not build a custom tank first
The most expensive beginner mistake is starting with a custom-built tank.
It is tempting. You see professional water shots and assume the first step is a custom acrylic or glass tank. Then you start researching Plexiglas, low-iron glass, silicone, acrylic glue, glass thickness, tank dimensions and sealing methods.
That can quickly turn into several weekends of work before you have even shot a useful test.
A custom tank can be the right solution later. But it should solve a real problem you already understand.
If you build it too early, you are guessing. You may choose the wrong size, wrong height, wrong glass, wrong access points or wrong weight. You may spend money on a tank that is hard to clean, hard to light or too heavy to move when full.
Start with ready-made containers first. Learn what you actually need. Build custom later.
The ready-made aquarium is the best first water rig
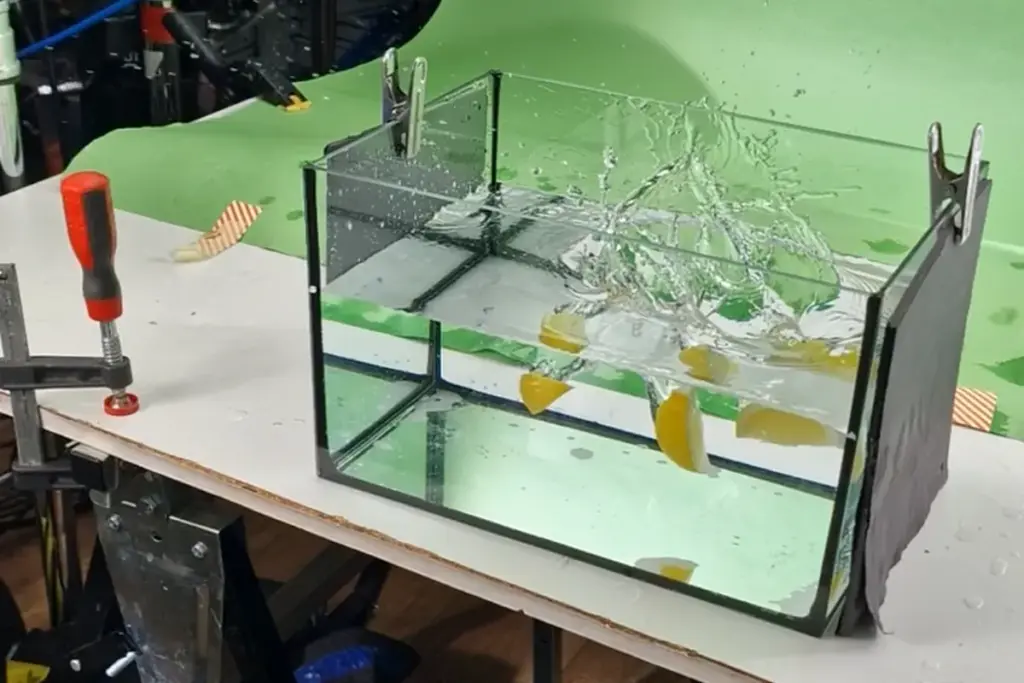
A small rectangular aquarium is one of the most useful first tools for tabletop water work.
It gives you a flat front glass surface, a controlled water volume, and a simple way to shoot through the side. You can place it on a table, light it from outside, drop products into it, add bubbles, or use it as a catch basin for splash tests.
A small aquarium can help you shoot:
- fruit dropping into water or milk
- product drops into liquid
- small splashes from above
- underwater product shots
- bubbles behind a subject
- light tests through water
- basic rig tests above a catch basin
For a beginner, this is a better investment than a custom tank. You can start quickly, learn faster and avoid spending too much money before you know what kind of shots you will actually repeat.
What size aquarium should you start with?
You do not need a huge tank at the beginning.
A small rectangular aquarium in the approximate range of 30 × 20 × 20 cm is enough for many first tests. It is small enough to handle, fill, clean and move. It also holds much less water than a large custom tank, which makes the setup safer and easier to manage.
Large tanks look useful, but they become heavy very quickly. Water weight matters. One litre of water weighs about one kilogram. A tank that looks manageable when empty can become heavy and dangerous when full.
Start with a size you can actually move, clean and control.
Glass tint and why low-iron glass matters later
Cheap aquariums often use standard soda-lime glass. This glass can have a slight green or blue tint, especially visible on the glass edges.
For many beginner shots, this is not a major problem. The image may still look good, especially with colorful food, darker backgrounds or practical tests.
But for beauty shots, white packaging, clear liquids or transparent products, the tint can become visible. White labels may look slightly cool. Clean water may look green-blue. Transparent packaging can pick up the glass color.
The professional solution is low-iron glass. It is clearer and has much less color tint. It is often sold under names like ultra-clear, Optiwhite or similar brand terms.
Low-iron glass is more expensive, so it is not necessary for your first tests. A practical compromise later is to use low-iron glass only on the front side where the camera sees through the tank, and standard glass on the back or bottom.
For your first water rig, do not overthink this. Use a normal aquarium, learn the shot, then upgrade the glass only when the image demands it.
The bubble rig that costs very little
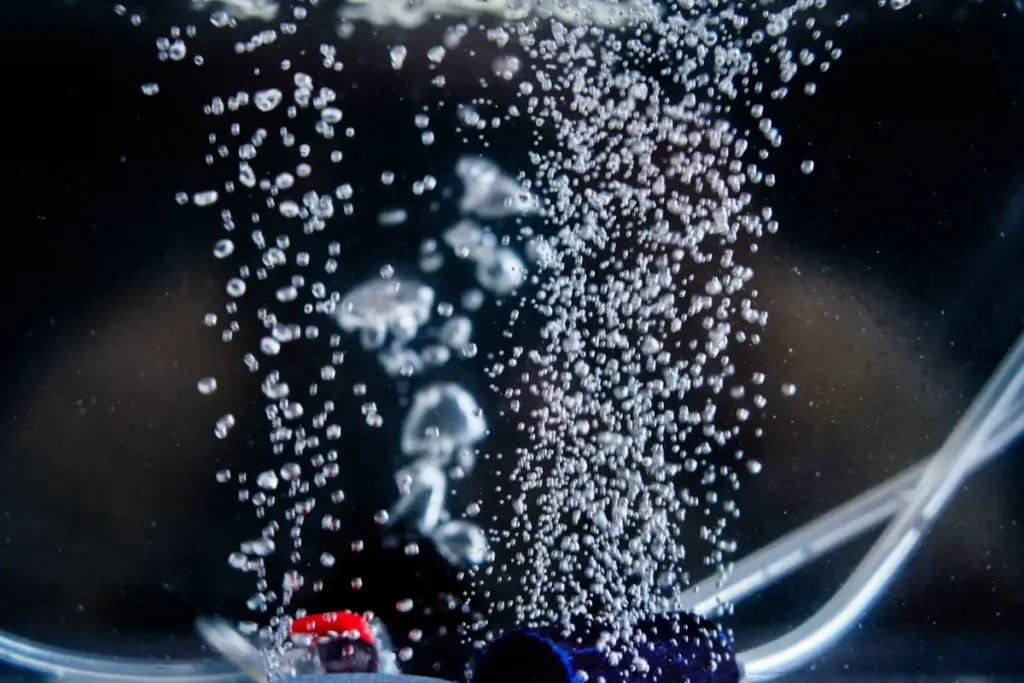
The simplest water rig does not need a compressor, motor or controller.
You only need a small aquarium pump, clear tubing and an air stone.
Place the air stone in the water, connect it to the pump, and turn the pump on. That is enough to create bubbles for many shots.
A basic bubble setup can be used for:
- background bubbles in underwater product shots
- fake boiling in cold water
- texture inside clear liquids
- movement behind a product
- atmosphere in a small tank
Different air stones create different bubble sizes. Some create fine, soft bubbles. Others create larger, more irregular bubbles. You can also make simple custom bubble sources with drilled holes if you need larger or more random bubbles.
This is one of the best beginner tests because the cost is low, the setup is simple and the result is immediately visible on camera.
Fake boiling without heat
A bubble rig can also create a fake boiling effect.
Instead of heating a pot, you place an air source under the water. The bubbles rise and break the surface, making the water look active for the camera.
This is useful for food shots where real boiling would create problems. Real heat can overcook food, create steam control issues, fog glass, make the set unsafe or shorten the working time. Fake boiling gives you more control.
You can use cold or room-temperature water and still create the visual impression of boiling movement.
For tabletop filming, this is often more practical than using real heat.
When to build a custom water rig
Custom builds make sense after you have tested ready-made setups and know what limits you are hitting.
You may need a custom rig when:
- the aquarium is too narrow for the shot
- you need a very shallow tank for a top-down view
- the glass tint is affecting the product
- you need a removable panel for cleanup
- the camera angle requires a special shape
- you need a cutaway cooking pot or bottle vortex rig
At that point, custom building solves a specific problem. That is when it becomes worth the time and cost.
For example, a cooking pot cutaway rig makes sense if you need a cooking-context shot where the camera sees through the side of the pot. A bottle vortex rig makes sense if you need a from-inside-the-bottle liquid movement. A custom tank makes sense if a normal aquarium cannot give you the size, angle or glass quality you need.
But these are specialized rigs. Build them when the shot requires them, not before.
Cutting and sealing safety
Some water rigs involve cutting metal, glass or plastic. This should be treated carefully.
If you cut a metal cooking pot, use proper eye protection, gloves and a safe working area. Sparks from an angle grinder can damage nearby materials and start fires if the workspace is not clear.
After cutting, seal and finish the sharp edge before the rig goes near the set.
If you work with glass bottles, do not use random power tools to cut them. Use a proper glass scoring method and finish sharp edges before handling the bottle repeatedly.
A water rig should not only look good on camera. It also needs to be safe to fill, move, clean and reuse.
Test with plain water first
Every water rig should be tested with plain water first.
Not milk. Not coffee. Not juice. Not the brand’s product.
Plain water.
There are several reasons for this. You may need ten or twenty tests before the rig works. You may discover leaks. You may need to change the angle, move the pump, adjust the tube, modify the lighting or change the camera position.
If you do all of that with hero liquid, you waste money and create unnecessary cleanup.
Plain water is also safer for testing leaks and splash direction. If water ends up on the floor, it is a problem. If colored juice, coffee, milk or chocolate ends up on the floor, on the camera stand, on the laptop or on a client-visible surface, it becomes a much bigger problem.
Test with water first. Move to the real liquid only when the setup is stable.
Minimum equipment to start
A basic tabletop water rig starter setup can be very small:
- small ready-made aquarium
- aquarium pump
- air stone
- clear tubing
- towels
- plastic protection for the table
- basic clamps or small stands
- plain water for testing
This is enough to start shooting simple product drops, bubbles, underwater tests and small splash experiments.
You can add more later: custom tanks, syringe splash rigs, pumps, nozzles, cutaway pots, vortex bottles or pneumatic liquid systems. But the first goal is to learn how water looks and behaves in front of the camera.
FAQ
Can I use a glass vase instead of an aquarium?
Yes, for some shots. A glass vase can look beautiful, but curved glass creates distortion. Sometimes that distortion adds character. Sometimes it makes the image unusable. Use vases when the distortion helps the shot, and aquariums when you need a clean flat view through the water.
How do I protect the camera from water?
Use distance, angle and shielding. Do not place the camera where the main splash path can hit the lens. A clear plastic shield can protect the lens area for close shots. Keep electronics away from the wet side of the set and test splash direction with plain water first.
What is the difference between a splash rig and a pour rig?
A splash rig creates a short impact moment. It delivers liquid quickly to create a burst, jet or collision. A pour rig creates a sustained stream over time. Both are useful, but they solve different visual problems.
Can I shoot underwater products without putting the camera underwater?
Yes. Use a flat-front aquarium. The camera stays outside the tank and shoots through the glass. The product is underwater, but the camera is not. The result depends on clean glass, lighting, focus and the distance between the product and the front glass.
Should I start with a custom tank?
No. Start with a ready-made aquarium first. Build custom only after you understand what size, glass quality, access and shape your shots actually need.
Where to go from here
If you are still learning the bigger system, start with what tabletop rigging is and how water rigs fit together with air and motion-control rigs.
If you are deciding between air, water and motion control, read the guide on which tabletop rig to build first.
You can also see real tabletop rigging examples in the Rig Lab Academy work section.
The course covers water rigs in more depth, including aquariums, custom tanks, bubble rigs, syringe splash rigs, cooking pot cutaway rigs and bottle vortex setups. The waitlist is open.
A tabletop water rig should start simple. Learn with a small aquarium, test with plain water, protect the set, and build custom only when the shot tells you what it needs.