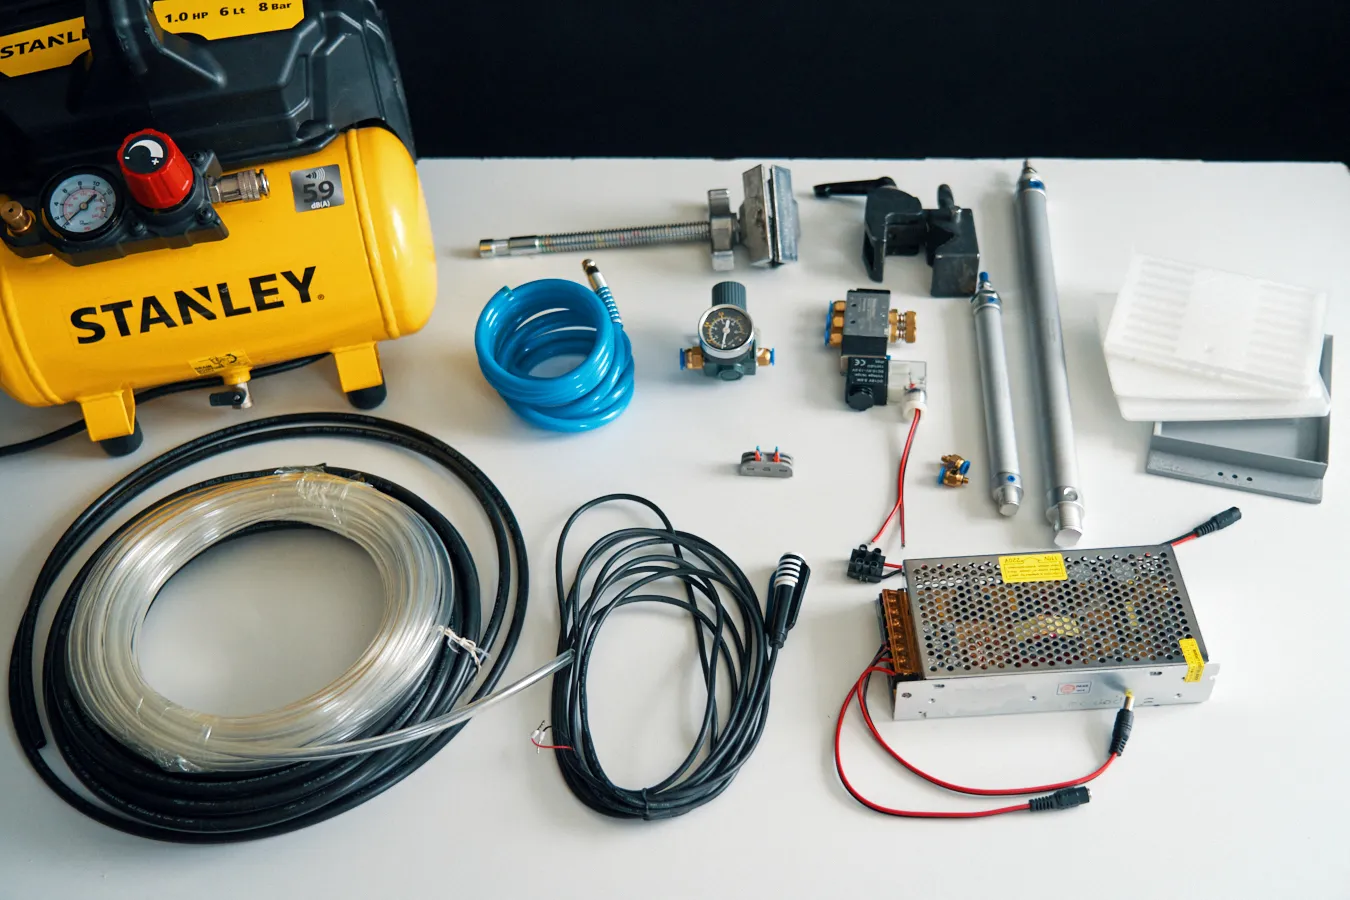
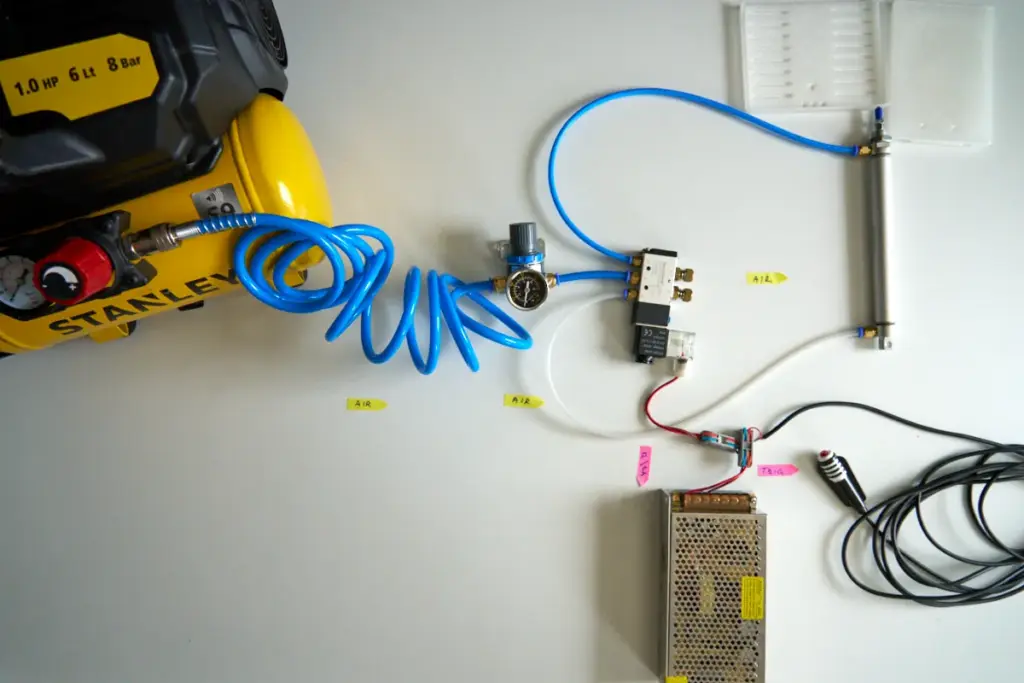
A beginner air rig setup does not need to be complicated. For most tabletop food video rigs, the basic system is the same: compressed air goes from a compressor, through a pressure regulator, into a solenoid valve, through pneumatic hoses, and finally into a cylinder or other air-driven part.
That sounds technical at first, but the idea is simple. Air creates movement. The regulator controls how strong that movement is. The solenoid valve controls when the movement happens. The trigger tells the solenoid when to fire.
Once you understand this chain, pneumatic rigging becomes much easier. A slide drop rig, syringe splash rig, small launcher, impact trigger or product release system may look different on set, but the air system behind it is often almost the same.
This is why beginners should not start by buying random cylinders and valves. First, understand the basic air path. Then every pneumatic rig becomes easier to build, test and troubleshoot.
Beginner air rig setup: the basic air path
The easiest way to understand an air rig is to follow the air.
In a simple tabletop setup, the air path looks like this:
- compressor
- pressure regulator
- solenoid valve
- pneumatic hose
- pneumatic cylinder
- moving rig part
The compressor stores and supplies the air. The regulator reduces the pressure to a usable level. The solenoid valve sends air to the cylinder when triggered. The cylinder converts air pressure into mechanical movement.
If one part of this chain is wrong, the whole rig becomes unreliable.
Too much pressure and the rig shakes. Too little pressure and the cylinder does not move properly. Wrong valve and the cylinder may not return. Loose fittings and the system leaks. Bad mounting and even a good cylinder creates a bad shot.
A good air rig is not only about power. It is about controlled, repeatable movement.
1. Compressor: the air source
The compressor is the starting point of the system. It creates compressed air and stores it in a tank so the rig can fire repeatedly.
For tabletop food video, you usually do not need a large industrial compressor. Most small pneumatic rigs use very little air per shot. A slide drop, small release mechanism or syringe push does not empty the tank quickly.
A small compressor with a tank is normally enough for beginner air rigs. The tank gives you a stable supply of air, and the compressor refills it when pressure drops.
What matters more than size is control. A loud, oversized compressor does not automatically create better shots. If the pressure is not regulated properly, even a small cylinder can hit too hard and shake the whole setup.
What to look for in a beginner compressor
- small tank compressor for repeated firings
- stable pressure output
- manageable noise level for your studio
- standard hose connection
- easy access to the tank drain valve
- enough pressure for 3–6 bar working range
Many consumer compressors can deliver more pressure than you need. That is why the next part, the pressure regulator, is essential.
2. Pressure regulator: the control point
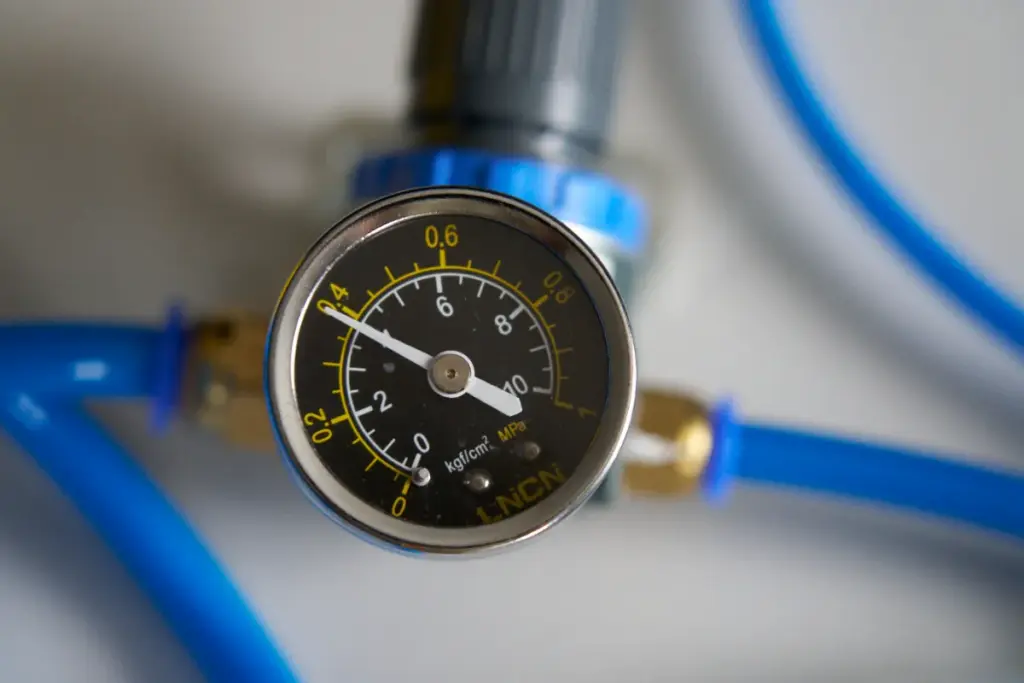
The pressure regulator is one of the most important parts in a beginner air rig setup.
The compressor may store air at a higher pressure, but your tabletop rig usually needs much less. The regulator lets you reduce and adjust the working pressure before the air reaches the solenoid and cylinder.
Without a regulator, the cylinder can fire too hard. That can shake the rig, crack 3D printed parts, move the camera support, damage food placement or make the shot look uncontrolled.
Most small tabletop pneumatic actions work somewhere around 3–6 bar, depending on the cylinder size, friction, weight and rig design. A simple slide drop might work around 3–4 bar. A heavier syringe push or launcher may need more.
The rule is simple:
Start low, then increase pressure only when the movement is too weak.
Do not start at maximum pressure. First test the rig with no food and no expensive camera gear nearby. Watch how the mechanism moves. Listen for harsh impact. Check if anything shakes or loosens.
Why pressure control matters
- it reduces unnecessary vibration
- it protects 3D printed parts and brackets
- it makes the action easier to repeat
- it helps match the rig to delicate food or products
- it makes testing safer
A regulator is not optional. It is the part that turns compressed air from raw power into usable rig control.
3. Solenoid valve: the air switch
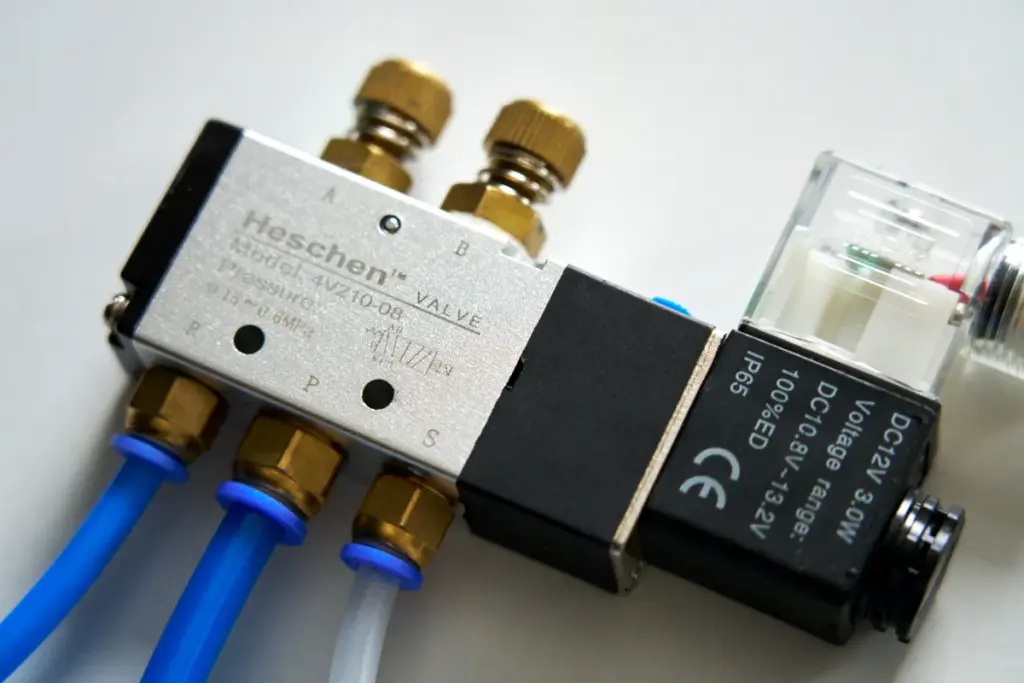
The solenoid valve is the part that decides when air moves into the cylinder.
You can think of it as an electrically controlled air switch. When the solenoid receives power, it changes position and sends air to the cylinder. When the power changes or stops, the valve switches back or moves to the other position, depending on the valve type.
For most beginner tabletop rigs with double-acting cylinders, a 5/2 solenoid valve is the safest starting point.
Why 5/2 is the usual beginner choice
A 5/2 valve has five ports and two positions. It can send air to one side of the cylinder while exhausting the other side. This allows a double-acting cylinder to extend and retract in a controlled way.
For a slide drop rig, the valve can pull the plate away and then return the cylinder. For a syringe push, it can push and retract. For a release mechanism, it can fire and reset.
That flexibility makes 5/2 valves useful across many rigs.
12 V or 24 V solenoid?
Both 12 V and 24 V solenoid valves can work. The important thing is consistency.
If your first valve is 12 V, your power supply, trigger and relay setup should match. If you choose 24 V, build around that. Mixing random voltages makes the rigging box confusing and increases the chance of wiring mistakes.
For many beginner tabletop setups, 12 V is easy because small power supplies, switches and relay modules are common. For more industrial-style pneumatic systems, 24 V is also normal.
Pick one voltage and label everything.
4. Pneumatic hose and fittings
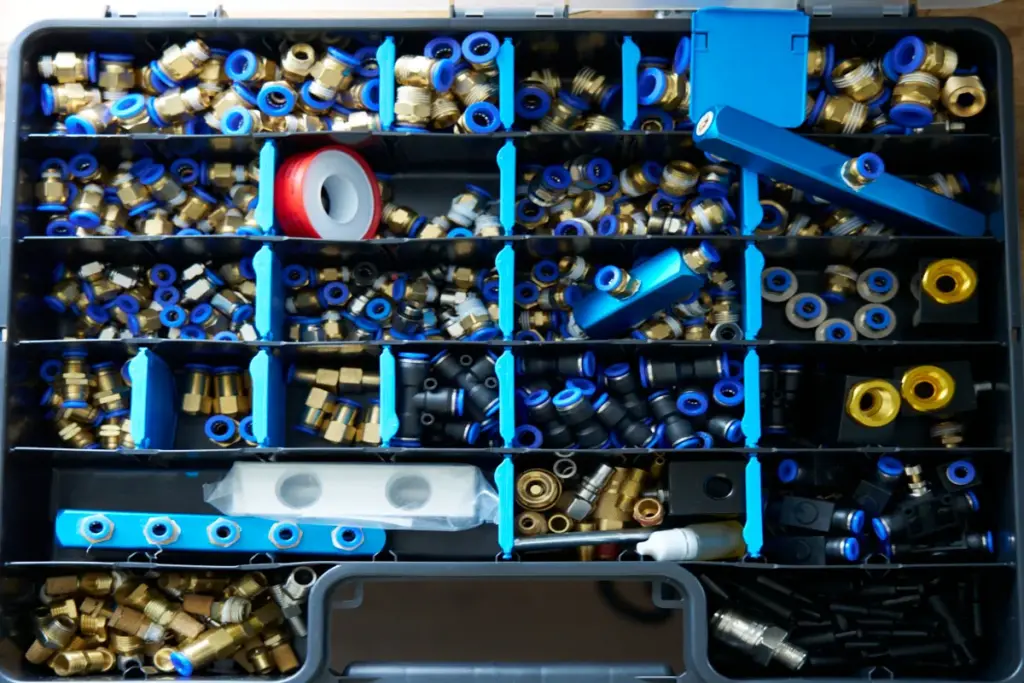
Hose and fittings look like small details, but they decide whether the air system is clean or frustrating.
Most small tabletop rigs can use 6 mm pneumatic hose. It is flexible, easy to route and works well with many 16 mm and 20 mm cylinders. Larger systems may use 8 mm hose, but beginners do not need to start with multiple hose sizes.
The easiest approach is to standardize one hose size at the beginning.
For example, if you build around 6 mm hose, then buy fittings, elbows, straight connectors and T-connectors for 6 mm. Keep everything in one small parts box. That way you are not searching for adapters every time you build a new rig.
Useful fittings for a starter kit
- straight push-fit fittings
- 90-degree elbow fittings
- T-connectors
- thread adapters for cylinder ports
- extra hose clips or cable ties for routing
- spare 6 mm hose
Leaks often come from fittings that are not fully seated, damaged hose ends, mismatched thread types or old tape on threaded connections. When something leaks, do not panic. Follow the air path and check each connection one by one.
Cut hose ends cleanly. Push the hose fully into the fitting. Keep spare fittings nearby. Small details save time on set.
5. Pneumatic cylinder: where air becomes movement
The pneumatic cylinder is the part that turns air pressure into linear movement.
For beginner tabletop rigs, both 16×200 mm and 20×200 mm double-acting cylinders are practical starting sizes. In pneumatic cylinder sizing, the first number is the bore diameter and the second is the stroke.
A 16×200 mm cylinder is lighter and provides enough force for many simple tabletop actions. A 20×200 mm cylinder provides more force and additional headroom for heavier moving parts, higher friction, or rigs such as larger syringe pushes. Both use the same useful 200 mm stroke, so the choice mainly depends on how much force the rig needs.
You can use these cylinder sizes for:
- pneumatic slide drop rigs
- small release systems
- syringe splash tests
- light launcher setups
- simple push or pull actions
The cylinder is important, but it is not the whole rig. A good cylinder mounted badly will still create a bad result. The body must be fixed securely, and the rod must pull or push in the correct direction without binding.
Before adding food or liquid, fire the cylinder slowly at low pressure and watch the motion. If the rod twists the mechanism, the mounting angle is wrong. If the rig jumps, reduce pressure or improve the frame. If the movement sticks, look for friction before increasing pressure.
6. Trigger: how you fire the rig
The trigger can be very simple at the beginning.
For one solenoid valve, a push button can be enough. Press the button, the valve fires, the cylinder moves. This is already useful for many beginner rigs.
Later, you can add a relay module, foot pedal, camera trigger, timer, or a small controller such as an Arduino. But you do not need to start there.
The first goal is repeatability, not complexity.
Simple trigger options
- manual push button
- foot switch
- relay module
- basic timer module
- Arduino-style controller for sequences
- camera sync cable for advanced setups
For slow-motion food work, timing matters. A small delay can change where the food is when the camera captures the best moment. But beginners should first learn to trigger one action cleanly before trying to synchronize multiple valves, motors and cameras.
One clean trigger is better than five unreliable triggers.
7. The most common beginner wiring mistake
The most common wiring mistake is mixing power systems without labels.
A 12 V solenoid, a 24 V valve, a 5 V controller, random DC adapters and unmarked cables can quickly become a mess. You may not know which supply belongs to which part. Worse, you may connect the wrong voltage to the wrong component.
For a beginner air rig setup, keep wiring boring and clear.
- choose one solenoid voltage
- label every power supply
- label trigger cables
- keep low-voltage electronics away from water
- use terminal blocks or proper connectors instead of loose wires
- test without food before filming
Good cable management does not look as exciting as a moving rig, but it makes the rig safer and faster to rebuild.
8. How to test the air system before filming
Do not test a new air rig for the first time inside the final set.
Build the air system on the table first. Connect the compressor, regulator, solenoid, hose and cylinder. Keep the pressure low. Fire the cylinder without any food, glass, liquid or expensive props nearby.
Watch for four things:
- does the cylinder move in the correct direction?
- does it return correctly?
- does anything leak?
- does the rig shake too much?
If the cylinder moves the wrong way, swap the cylinder hose connections at the valve. If it does not move, check the pressure, power supply, trigger and valve wiring. If it leaks, follow the air path and check fittings one by one.
Once the air system fires reliably ten times in a row, then connect it to the actual rig mechanism.
After that, test with dummy objects before using hero food. This protects your budget and keeps the session calmer.
9. A simple starter air rig parts list
If you are building your first beginner air rig setup, this is a practical starting list:
- small compressor with tank
- pressure regulator
- 5/2 solenoid valve
- 12 V or 24 V power supply
- push button or foot switch
- 6 mm pneumatic hose
- push-fit fittings
- 16×200 mm or 20×200 mm double-acting pneumatic cylinder
- 20×20 aluminium profile or rigid base structure
- mounting brackets
- lock nuts, bolts and washers
- labels for cables and hoses
- basic multimeter
You do not need to buy everything in every possible size. Start with one standard system and learn it properly.
A standardized kit is cheaper in the long run because parts can move between rigs. The same compressor, regulator, valve, hose and cylinder can help you build many different tabletop actions.
10. What this setup can become later
Once the basic air system works, you can reuse it in many rigs.
The same air path can power a slide drop rig, where a cylinder pulls a plate away. It can drive a syringe splash rig, where the cylinder pushes liquid through a nozzle. It can fire a small launcher, release a spring-loaded mechanism, move a hidden trigger, or create a timed impact.
The difference between those rigs is not always the air system. Often, the difference is only the attachment at the end of the cylinder.
This is the real value of learning the basic setup first. You stop thinking about every rig as a completely new machine. You start seeing reusable systems.
Final thoughts
A beginner air rig setup should be simple, safe and repeatable. Compressor, regulator, solenoid, hose, cylinder and trigger — that is the foundation.
Do not start with maximum pressure. Do not buy random parts in different voltages and hose sizes. Do not skip the regulator. Do not test the rig for the first time next to expensive camera gear.
Build the air path first. Test it at low pressure. Fix leaks. Standardize your fittings. Label your cables. Then connect the system to a real rig.
Once you understand this basic air setup, pneumatic rigging becomes much less mysterious. You can build cleaner drop rigs, better release systems and more repeatable slow-motion food shots with fewer mistakes.
For the bigger picture, start with what tabletop rigging is and how air, water and motion-control systems fit together.
If you are still deciding which type of rig to build first, read the guide on which tabletop rig to build first.
The course goes deeper into practical air rigs, including slide drop rigs, launcher setups, pneumatic syringe splash rigs and real tabletop testing workflow. The waitlist is open.