If you are wondering which tabletop rig to build first, the best answer depends on the shot you repeat most often: air, water, or motion control.
How to decide which tabletop rig to build first
Before choosing parts, look at the kind of shot you need to repeat. If you need fast mechanical action, start with air. If the shot is about liquid, start with water. If the shot needs programmed movement, then motion control makes sense.
You can spend five hundred euros in your first week and still not have a rig that works.
I have seen it happen many times. Someone watches a motion-control video, orders a NEMA 23 stepper, a fifty-volt power supply, three drivers, two sliders. A month later they still cannot reliably drop a tomato into a bowl.
The problem is not that they bought bad parts. They bought the answer before the question. So let me give you the question.
The most important choice in your first month is not what to build. It is which category to start in. Get that right and the rest gets easier. Get it wrong and you spend three months learning a category that does not fit your work.
This post is the framework. It will not tell you what to buy. It will tell you which of the three categories — air, water, or motion control — your first rig should come from.
The wrong question vs the right one
Wrong question: what is the best tabletop rig?
There is no best rig. There are rigs for specific shots. A slide drop rig is best if you need to drop food. A syringe splash rig is best for a controlled liquid jet. A motorized slider is best for a smooth camera move. None is better than the others.
Right question: what shots am I trying to make this year?
The category should match your shots, not your enthusiasm for gear.
Three categories in 60 seconds
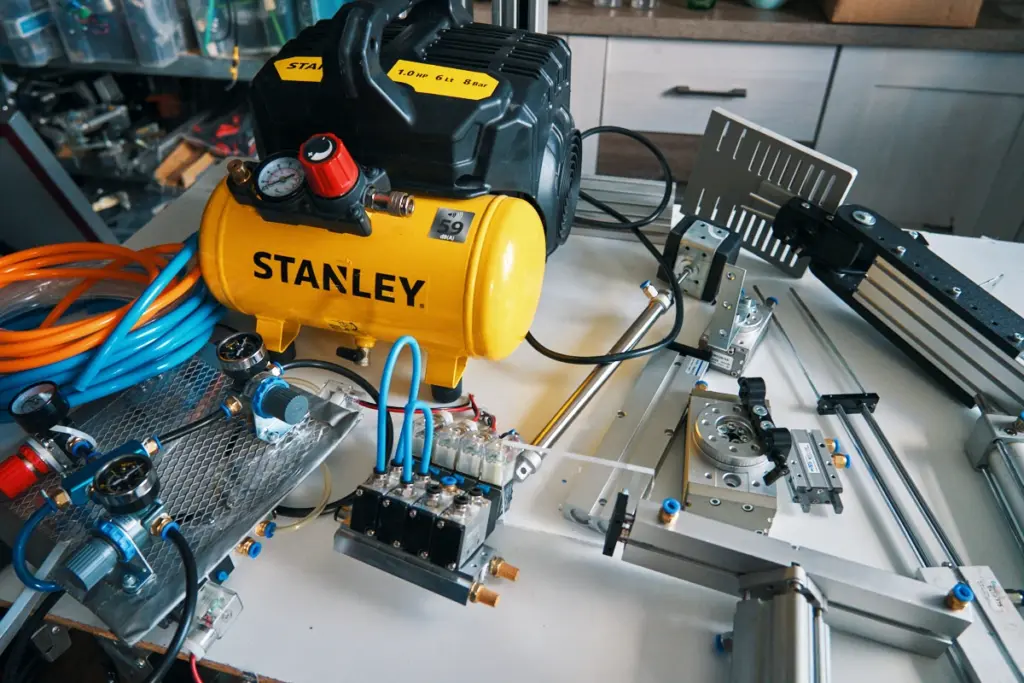
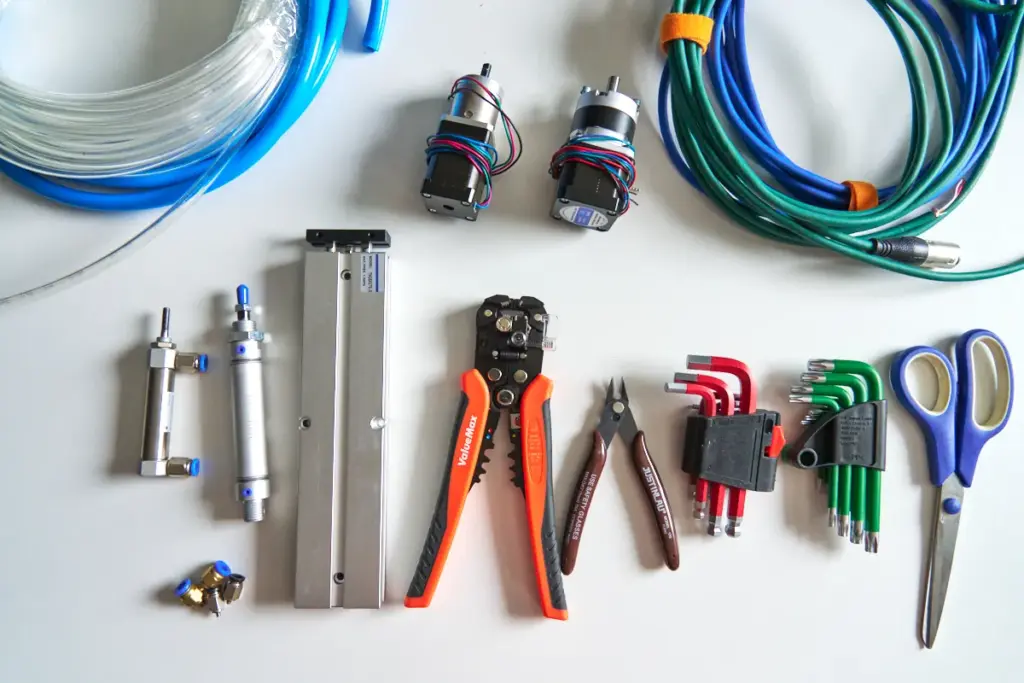
Air rigs use compressed air. A cylinder fires, a valve opens for a fraction of a second, something gets released or launched. Lowest cost to start. Most beginner-friendly. Push a button, food drops cleanly.
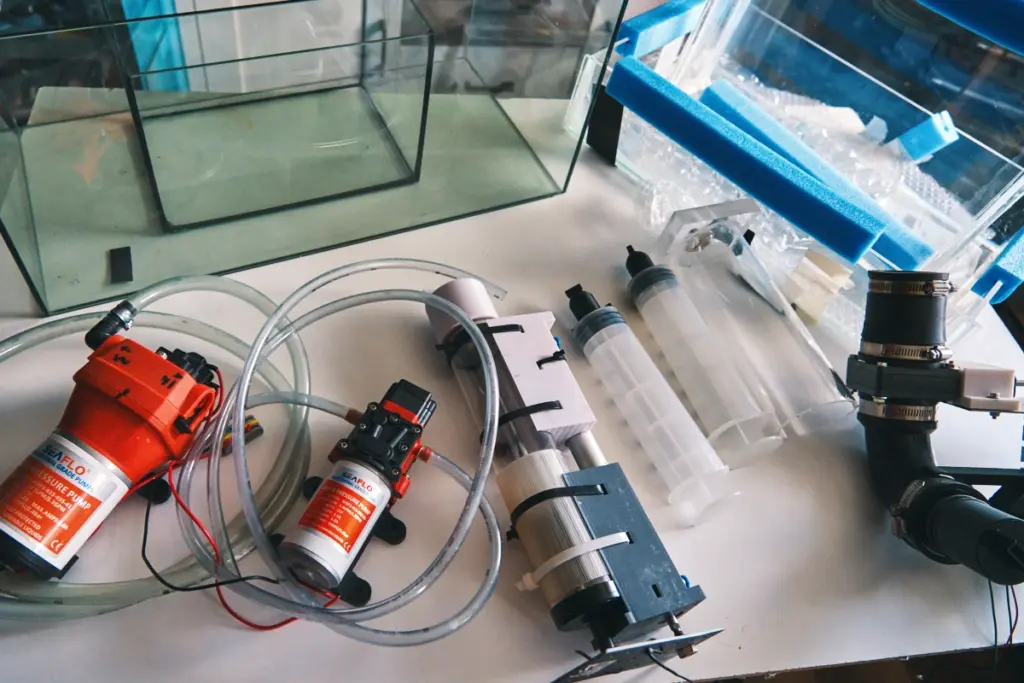
Water rigs deal with liquid. Splashes, pours, drops into water, bubbles, fake boiling. Most visually exciting. Most likely to ruin gear if you are careless. Cheapest to start — a ready-made aquarium and an aquarium pump cost almost nothing.
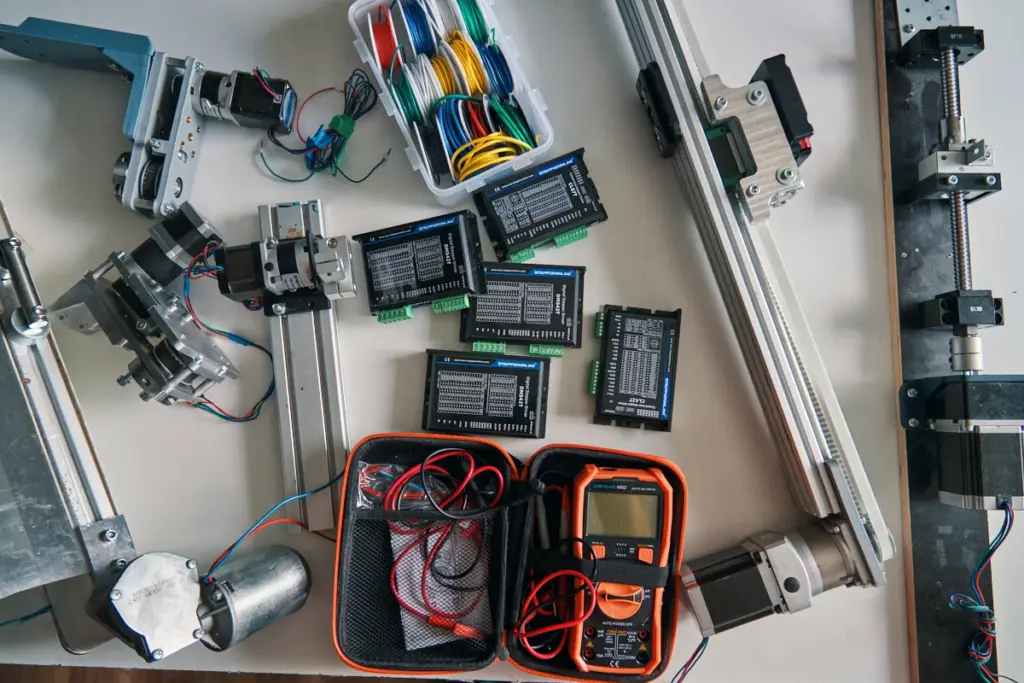
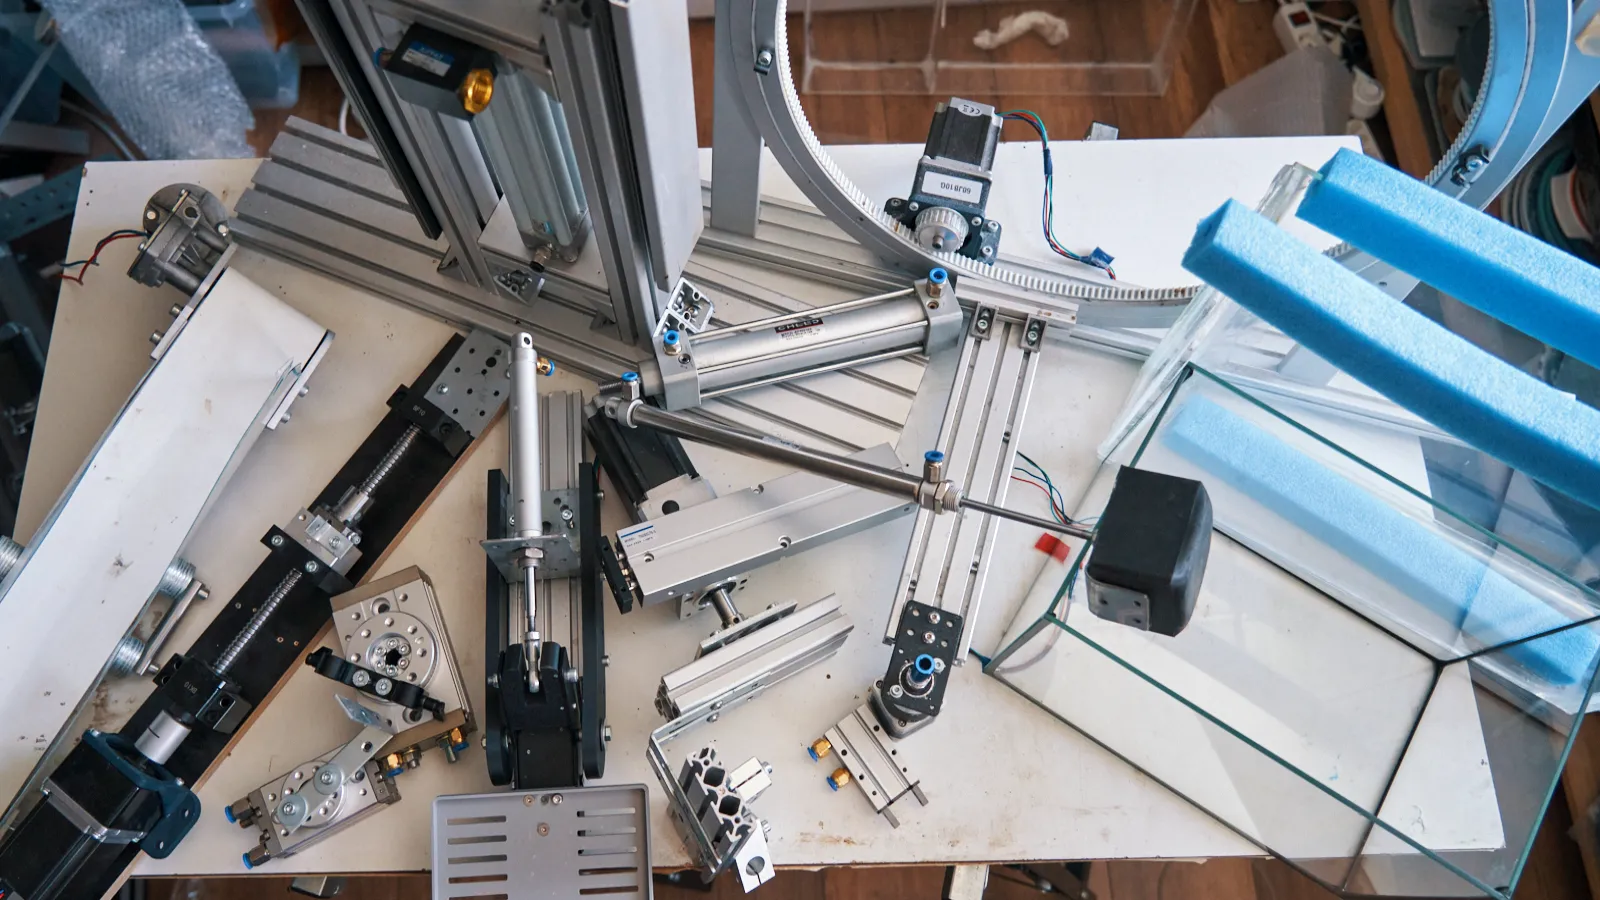
Motion control is the electric side. Stepper motors, drivers, controllers, sliders, motorized pours. Most technical. Highest cost to start. Slowest to give you results. Worst place for a beginner.
That covers it. Now the questions.
The 4 questions that decide
1. What kind of shots do you make most?
Mostly food being dropped, thrown, or launched? Burger ingredients onto a bun, eggs cracking into a pan, spices colliding above a pot — start with air.
Mostly drinks, splashes, fruit landing in water, coffee pours? Start with water.
Mostly product reveals with smooth camera moves, or precise pours of a single bottle? You probably think motion control. It probably is not your category yet — most of those shots can be done first with simpler rigs, then motion control added later. More on that below.
Not sure what you mostly shoot? Default to air. It is the most flexible.
2. What is your budget for month one?
- Air rigs to start: roughly €120–300, depending on supplier and shipping. One cylinder, one solenoid, small compressor, hoses, fittings, a manual trigger, threaded rods, a 3D-printed plate.
- Water rigs to start: roughly €40–100. A small ready-made aquarium, an aquarium pump, an air stone, some tubing. More if you also want a syringe splash rig.
- Motion control to start: roughly €350–800 for the basics — one stepper motor, a driver, a power supply, a basic controller, cables, an enclosure. Prices vary significantly by source and market. That is before any ready-built system like Mantis 2.
Under €200? Water is almost the only sensible category. €200–400? Air. Motion control only makes sense once you have built rigs in the other two and your budget is comfortably above that range.
3. Do you have access to a 3D printer?
Sounds like a small question. It is not.
Air and water rigs both rely on 3D-printed parts — plates, cups, syringe tips, mounts. With a printer at home or nearby, your costs drop and your iteration is fast. You can redesign a part over lunch and have a new one printed by evening.
No printer? You can still build, but you pay someone else to print every part. That adds friction and cost to every change. Simpler designs win.
Motion control depends less on printing.
No printer at all? Lean toward water rigs. Most of what you need is off-the-shelf.
4. How patient are you with electronics?
Be honest.
Air rigs use electronics, but barely — a solenoid valve needs 12V, a button to send 12V when pressed. That is the whole electrical side of your first three rigs.
Motion control is different. You configure DIP switches. You measure motor current with a multimeter. You troubleshoot why a motor is humming but not turning. You read datasheets. You write or paste Arduino code. None of this is hard. All of it takes patience. If electronics annoy you, motion control will frustrate you for months.
Water rigs sit in the middle — mostly mechanical, with some electrical.
Electronics interest you? Motion control eventually becomes your favorite. They annoy you? Stay in air and water.
For checking motor specifications later, manufacturer documentation from suppliers such as STEPPERONLINE can be useful when comparing motor size, current, torque and gearbox ratios.
Why air wins for most beginners
I send most beginners to air rigs first, and the reasons are practical.
Fast feedback loop. You build a single-cylinder slide drop rig in an afternoon. You test it the same afternoon. You see what worked. Iteration is hours, not days.
One cylinder covers more shots than you expect. A slide drop rig drops food. Same pneumatic base with a different attachment becomes a launcher. Another attachment becomes an impact burst rig. One cylinder, three rig categories.
You can see what is happening. The cylinder fires. The plate moves. The food drops. Nothing is hidden inside a microcontroller. When something fails, you can see why.
Parts are not throwaway. The cylinder, solenoid, hoses, regulator, fittings all carry over into your second rig, your third, your tenth.
When water should be first instead
Skip air and start with water if:
- You mostly shoot drinks, splashes, or anything liquid-hero. Coffee, juice, beer, water, beverage commercial work.
- Your month-one budget is under €100.
- You already own a slow-motion camera and want footage this weekend. A ready-made aquarium and a phone splash test gets you something usable in an hour.
- You have a beauty shot brief for a specific liquid product and need a portfolio piece fast.
Water has a flat learning curve at the start (a bowl, water, a fruit, a camera) and a much steeper one later. Controlling liquid is harder than controlling solid objects, but the early shots are easy.
Why motion control should almost never be first
I’ll be direct: I have never met someone who started with motion control and was glad they did.
Not because motion control is too hard. Because motion control answers questions you do not have yet.
Without building a few mechanical rigs first, you cannot tell whether a problem needs a motor or just a better hand trigger. Without shooting some pours by hand, you do not know which pours actually need motorized control. Without knowing which shots fail because of timing, you cannot tell which timing is worth automating.
Motion control should be your third category, not your first. Build air. Build water. Then when you reach a shot the other two cannot solve, add motion control. By then you know exactly which motor, driver, and controller you need, because you have a real problem.
If you start with motion control, you spend three months learning parts of a system you do not yet know how to use.
A 30-day starter plan
This is what I would do if I were starting again today, rough budget around €250–350 depending on sourcing, basic 3D printer nearby.
Week 1. Buy a small ready-made aquarium (roughly €30–60 depending on size and retailer), an aquarium pump with air stone (around €10–15), a couple of glass containers from a thrift shop. Shoot a product drop into water. Shoot bubbles. Learn what the glass looks like under your lights.
Week 2. Order a small pneumatic kit. One 20×200 cylinder, one 5/2 solenoid valve, a 24-litre compressor, 6mm hose, push-fit fittings, a pressure regulator, a 12V power supply, a momentary push button. Approximate parts cost around €150–230 depending on supplier and market. Lay everything on a table and connect it. Hear the cylinder fire for the first time.
Week 3. Build the simplest slide drop rig. Aluminium profile base, 3D-printed plate, threaded rods, cylinder pulling the plate. Drop a dummy object — small plastic or wood the weight of food. Adjust pressure. Adjust plate smoothness. Adjust angle. Get a clean drop ten times in a row.
Week 4. Try the same rig with real food. Try a small launcher version. Drop a fruit into the aquarium from week 1.
By end of month: two categories touched, one shot you could put in your portfolio. Actual total spend will vary — budget around €200–300 as a working target, with the compressor as the biggest single cost.
The safest way to choose which tabletop rig to build first is to start with the rig that solves your most common shot, not the rig that looks most advanced.
FAQ
Can I learn all three at once?
You can. You will progress slower in each. Better to give the first category your full attention for a month, then add the second.
Is it worth buying second-hand parts?
For pneumatic cylinders and solenoids, yes. Industrial parts are durable. Second-hand prices are often half of new. For stepper motors and drivers, also yes, with caution — check wiring is intact and the driver works before paying. For aquariums, buy new or carefully inspected used. Glass cracks are dangerous.
I already own a manual camera slider. Should I motorize it?
A manual slider is fine for most slow-motion tabletop work. Motorize when you find yourself doing the same camera move three times in a shoot and wanting them to match exactly. Until then, manual is enough.
Phone instead of cinema camera — can I start?
For learning, yes. Modern phones shoot 240 fps, which teaches you the principles. The rigs you build for a phone are the same rigs you use later with a cinema camera.
Do you teach all three in the course?
Yes. Three modules — air, water, motion control — in that order. Waitlist is open at riglabacademy.com.
Where to go from here
Decided on air? The next post is the build guide for the pneumatic slide drop rig.
Decided on water? The syringe splash rig is the highest-impact first build, coming in next month’s content.
Decided on motion control? My honest suggestion is still to build one air rig first. If you are committed, the motion control module covers everything.
Course opens in October. Waitlist at riglabacademy.com. The work section shows what these rigs actually produce.