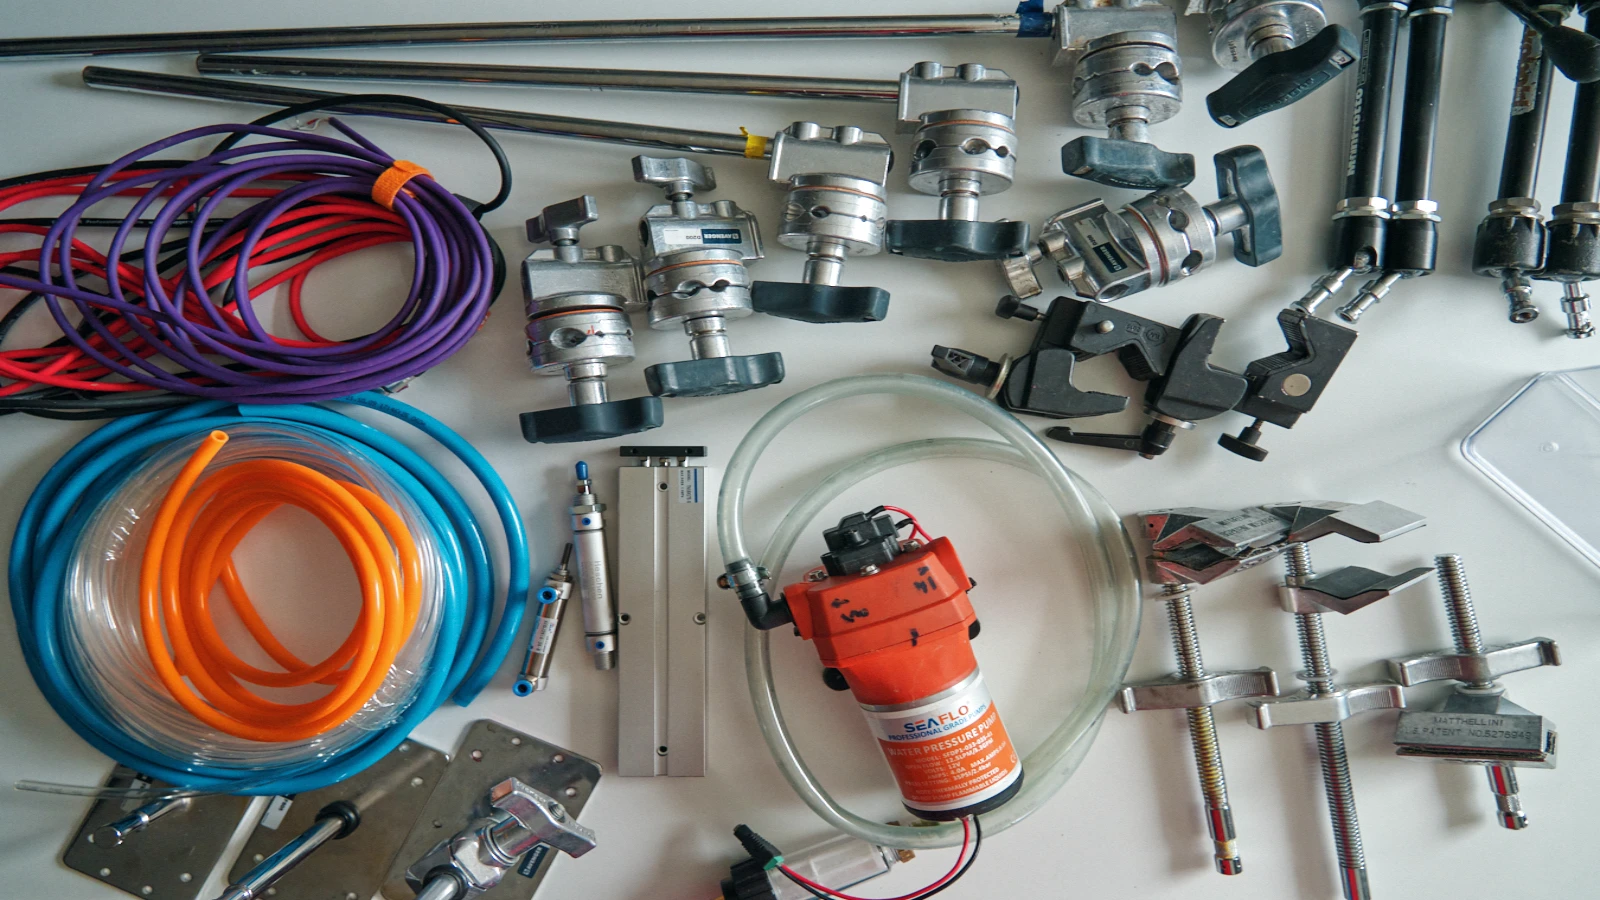
A beginner tabletop rigging kit should help you build your first repeatable food or beverage shot without wasting money on the wrong parts. It sounds simple until you start looking at pneumatic cylinders, solenoid valves, stepper motors, controllers, power supplies, hoses, clamps, cables, pumps, nozzles and hundreds of small adapters that all look important.
If you are still deciding between air, water or motion control, start with this guide on which tabletop rig to build first before buying parts.
They do not buy the wrong parts because they are careless. They buy the wrong parts because they do not yet know what kind of rig they are actually trying to build.
A tabletop rig is not just a collection of technical components. If you are still learning what tabletop rigging is, think of it as a small system built around one specific shot: a drop, a splash, a pour, a push, a pull, a rotation, a burst of air, or a controlled movement in front of the camera.
So before buying motors, controllers or expensive hardware, the better question is:
Beginner tabletop rigging kit: what to buy first
Beginner tabletop rigging kit: what to buy first
A beginner tabletop rigging kit should start with parts that help you hold, move, trigger and repeat a shot. That means mounting parts first, then one simple movement, then air, water or motorized control only when the shot really needs it.he parts
The biggest mistake is starting with the part list before thinking about the shot.
For example, a stepper motor sounds useful. But useful for what? Rotating a bottle? Moving a slider? Pulling a string? Turning a platform? Driving a small arm? Each of those setups may need a different motor, different speed, different torque and different controller.
The same is true for pneumatic parts. A cylinder is not just a cylinder. A small cylinder can release a support plate. A stronger cylinder can push an object. A fast cylinder can create a sudden action, but it can also be too aggressive for delicate tabletop work.
Water rigs are the same. A pump, tube or nozzle only makes sense when you know whether you want bubbles, a stream, a splash, a wave, a burst or a hidden liquid movement.
That is why a beginner tabletop rigging kit should not be a random box of parts. It should be built around simple, repeatable tests.
Beginner tabletop rigging kit: what it should do first
Your first kit should help you do four things:
- hold objects in a fixed position
- move something in a controlled way
- trigger the movement at the right moment
- repeat the shot more than once
That is the foundation.
It does not matter if the rig is pneumatic, water-based or motorized. If it cannot hold, move, trigger and repeat, it will not help much on set.
This is also why basic tools are often more important than impressive gear. A cheap clamp in the right place can solve more problems than an expensive motor mounted badly.A beginner tabletop rigging kit should stay simple: mounting first, one controlled movement second, and only then air, water or motorized parts.
1. Mounting parts are the real starting point
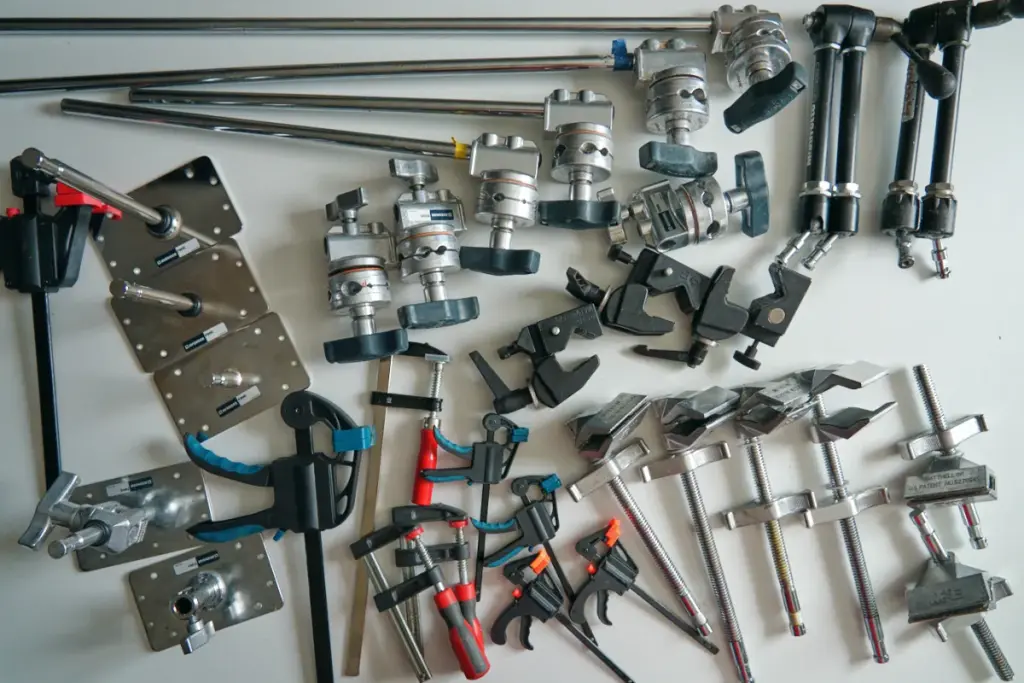
Before air, water or motion control, you need mounting.
In tabletop rigging, almost everything depends on placing small parts exactly where the camera needs them. A tube must be hidden behind a glass. A cylinder must pull from the correct angle. A bottle must rotate without wobble. A nozzle must stay in the same position for every take.
If your mounting system is weak, every other part becomes harder to use.
A good beginner mounting kit can include:
- small clamps
- magic arms
- mini ball heads
- light stand clamps
- wooden boards or base plates
- aluminium profiles
- simple brackets
- screws, washers and nuts
- gaffer tape and cable ties for temporary tests
You do not need a perfect professional rigging table at the beginning. A strong wooden board with mounting holes can already become a useful test platform. You can attach a small cylinder, a bottle holder, a hose guide or a simple release mechanism.
The important thing is that parts do not move between takes unless you want them to move.
2. Add one simple mechanical action
After mounting, add one simple action.
Do not try to build a complete motion control setup immediately. Start with one movement that solves one visual problem.
Good first movements are:
- pulling a plate away so something can fall
- pushing a small object into frame
- opening a valve
- lifting or dropping a small product
- rotating a bottle slowly
- moving a tube or nozzle into position
The goal is not to impress anyone with complexity. The goal is to learn how movement behaves on camera.
A movement that looks tiny in real life can look huge in slow motion. A small delay can change the whole shot. A part that moves too fast can destroy the timing. A part that moves too slowly can make the effect feel weak.
This is why first tests should be simple. When the movement is simple, you can understand what went wrong and improve it.
3. Pneumatic parts for fast action
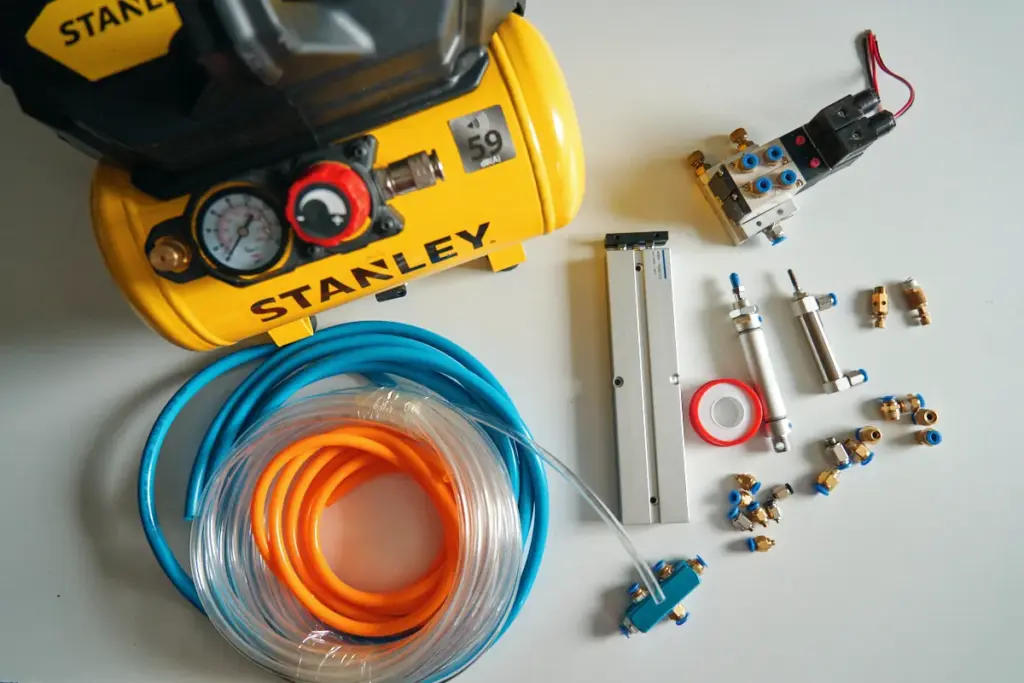
Pneumatic rigs are very useful when you need quick mechanical action. Air can push, pull, release or launch something faster and more consistently than a hand movement.
For a beginner kit, you do not need a huge pneumatic system. You need a small, understandable setup.
A basic pneumatic starter kit can include:
- small compressor or air source
- pressure regulator
- 6 mm or 8 mm pneumatic tube
- push-in fittings
- small pneumatic cylinder
- solenoid valve
- flow control valves
- manual trigger button or simple electronic trigger
The pressure regulator is important because full pressure is often too much for tabletop work. You want control, not chaos.
Flow control valves are also useful because they let you slow down or fine-tune the cylinder movement. This can make a rig much easier to film.
For food video, pneumatic rigs are especially useful for drops, releases, small impacts, sudden movements and hidden triggers.
The first pneumatic goal should be simple: make one cylinder move the same way every time.
4. Water and liquid parts for visible effects
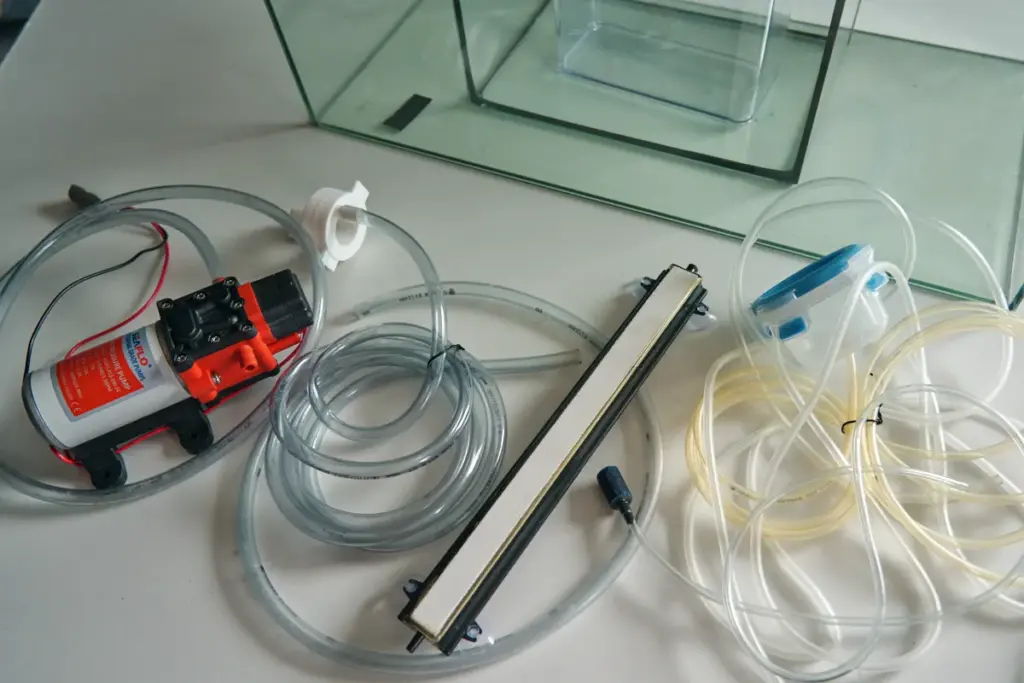
Water rigs are different because the rig often creates something visible in the shot. A tube, pump, nozzle or syringe can directly shape the splash, stream, bubble or wave.
This makes water rigs exciting, but also messy. A small change in pressure, angle or tube position can completely change the result.
A beginner water rigging kit can include:
- small aquarium pump
- clear silicone hose
- aquarium air stones
- plastic syringes
- simple nozzles
- small water container or tank
- hose clamps
- towels
- plastic protection for the table
Do not start with the biggest splash possible. Start with control.
Try to make a small stream appear in the same place. Try to create bubbles in a glass without moving the tube. Try to push liquid through a syringe and see how the shape changes. These small tests teach you more than one chaotic splash.
Water effects become better when the rig is hidden, stable and repeatable.
5. Motors are useful, but only when you know why
Motorized rigs are powerful, but they can also become expensive very quickly.
A motor is not automatically better than a pneumatic cylinder or a simple manual setup. It depends on the shot.
Motors are useful when you need:
- smooth repeatable rotation
- slow controlled movement
- programmed timing
- multiple takes with the same path
- movement that must sync with another action
For a beginner, the safest first motorized test is usually rotation. A bottle, glass, plate or small product can be rotated slowly and consistently. This is easier to understand than a complex multi-axis system.
Stepper motors are useful because they can move in controlled steps. But they also need the right driver, power supply, wiring and mechanical mounting. Buying a random stepper motor without understanding torque and speed can easily waste money.
So the rule is simple: buy a motor only when you know what it must move.
6. Triggers make the rig useful
A rig becomes much more useful when you can trigger it consistently.
At the beginning, this does not need to be complicated. A simple button, switch or relay can already help. Later, an Arduino or similar controller can trigger solenoid valves, motors, lights or other actions.
Useful trigger parts include:
- push button
- simple switch
- relay module
- 12 V solenoid trigger setup
- basic Arduino-style controller
- camera remote cable
- clearly labelled cables
Timing is critical in slow motion work. The camera may record many frames per second, but the action still needs to happen at the right moment.
If a drop starts too early, the product may already be out of position. If a splash starts too late, the best shape may happen after the hero moment. If a cylinder moves inconsistently, every take becomes different.
A trigger system helps remove guesswork.
7. Do not ignore cables and power
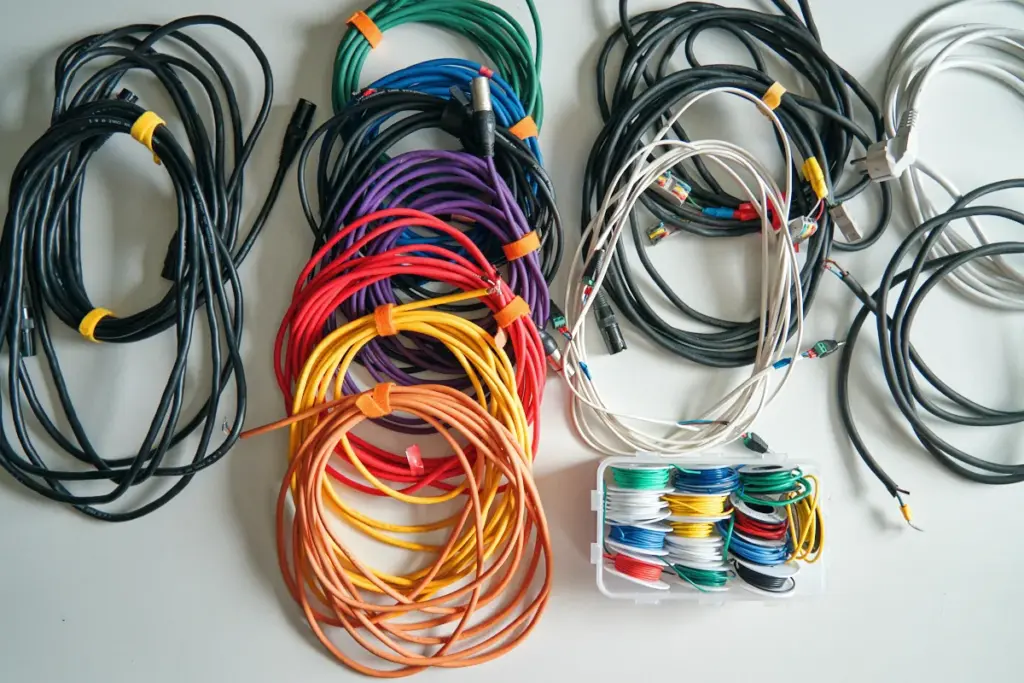
Cables and power supplies are not exciting, but they are one of the biggest sources of problems.
Many beginners buy motors, valves and pumps, then discover that nothing connects cleanly. The voltage is wrong, the connector does not match, the cable is too short, or the power supply is too weak.
A practical kit should include:
- 12 V power supply
- 24 V power supply if needed
- terminal blocks
- standard DC connectors
- wire labels
- heat shrink tubing
- multimeter
- spare cable
- one connector standard that you use repeatedly
Standardization is important. If every rig uses different plugs and adapters, setup time becomes longer and mistakes become more likely.
Choose a simple cable system and keep it consistent. Label everything. Keep air tubes, water tubes and electrical cables organized. This makes the rig easier to build again later.
8. Safety is part of the kit
Even small tabletop rigs need basic safety.
You may be working with water, electricity, glass, sharp tools, compressed air, motors and moving parts. None of this has to be dangerous if you test carefully, but it should not be treated casually.
A simple safety kit should include:
- safety glasses
- gloves for cutting or drilling
- towels and waterproof protection
- basic cable management
- non-slip mats
- first aid basics
- clear separation between water and electricity
Always test the rig away from expensive camera gear first. Check for leaks. Check for loose parts. Check if a cylinder moves too aggressively. Check if a motor has enough torque before placing a product on it.
A good rig is not only repeatable. It is predictable.
9. What not to buy first
There are many useful tools in tabletop rigging, but not all of them are useful at the beginning.
As a beginner, be careful with:
- large motion control systems before you know your shot style
- random stepper motors without a clear use
- too many different controllers
- large pneumatic cylinders for small tabletop actions
- special nozzles before testing simple water direction
- cheap cable sets with no clear standard
- complicated rigs that solve a problem you do not yet have
The better approach is to buy parts that can be reused across many small tests.
A clamp, base plate, tube, small cylinder, pump, trigger button or power connector can be used in many setups. A very specific part may only work for one shot.
10. A simple first kit structure
If you are starting from zero, build the kit in layers.
Layer 1: Mounting
Clamps, arms, base plates, screws, brackets and a small test surface.
Layer 2: One movement
A simple pull, push, drop, release or rotation.
Layer 3: One effect system
Choose air or water first. Do not build both at the same time unless you already have a clear shot.
Layer 4: Trigger
Add a button, switch, relay or simple controller so the action can repeat.
Layer 5: Cable and power standard
Make the setup clean enough that you can rebuild it later without guessing.
This is a much better path than buying advanced gear first and trying to understand it later.
Final thoughts
A beginner tabletop rigging kit should not be complicated. It should help you build small tests, understand movement and repeat shots with more control.
Start with the shot. Build a stable mounting system. Add one simple movement. Choose air, water or motorized control only when it solves a real problem. Keep cables clean. Keep the setup safe. Upgrade only when the next shot demands it.
The best beginner tabletop rigging kit is not the biggest kit. It is the kit that helps you create your first repeatable food or beverage shot without wasting money on parts you do not need yet.
If you keep your beginner tabletop rigging kit simple, reusable and easy to rebuild, every future rig becomes easier to plan.A simple beginner tabletop rigging kit should make your first tests easier, safer and more repeatable.