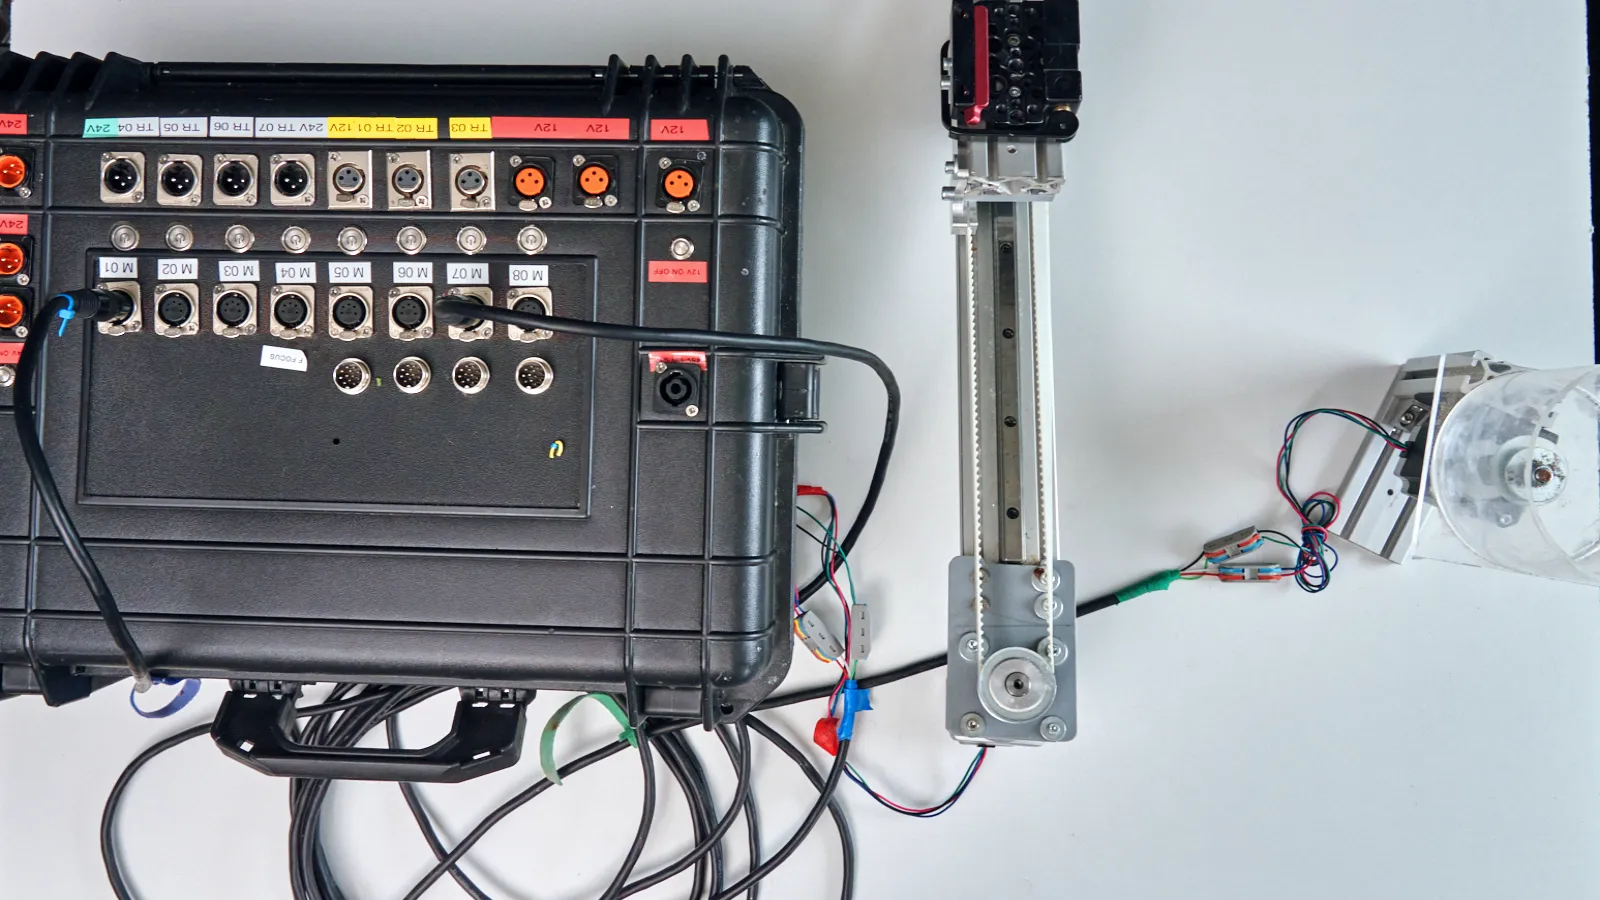
A stepper motor tabletop setup is useful when a food or product rig needs repeatable movement, precise position control and controlled speed across several takes.
For tabletop cinematographers, stepper motors are often the first serious step into motion control. They can rotate a product, move a slider, control a pouring rig, drive a small conveyor belt or repeat the same movement again and again.
The difficult part is not only buying a motor. The difficult part is understanding the full system: motor, driver, power supply, controller, wiring and mounting.
Stepper motor tabletop setup: what actually matters
A stepper motor tabletop setup only works well when the motor, driver and power supply match each other. A strong motor with the wrong driver can perform badly, and a good driver with weak power can still create unreliable movement.
The goal of a stepper motor tabletop rig is not maximum speed, but repeatable movement that can be controlled, tested and filmed more than once.
Stepper motor tabletop basics
A stepper motor is useful because it moves in controlled steps.
Instead of simply spinning when voltage is applied, a stepper motor moves by a defined amount every time it receives a step signal. A common stepper motor moves 1.8 degrees per full step, which means 200 full steps make one complete rotation.
For tabletop motion control, this is useful because the system can count steps.
If the motor moves a slider, tilts a bottle, rotates a product or drives a small conveyor belt, the controller can send a planned number of steps at a planned speed. That gives you repeatable movement without needing a complicated industrial robot.
This is why stepper motors are so common in DIY motion-control rigs.
Why stepper motors instead of DC motors?
A normal DC motor is simple. Apply voltage and it spins. Remove voltage and it stops.
That simplicity is useful for fans, pumps and basic rotating tools, but it is not ideal for tabletop motion control. A DC motor does not automatically know where it is. It does not move to an exact position unless you add sensors, encoders or a more complex control system.
For tabletop cinematography, position matters.
You may need a camera slider to move exactly 400 mm. You may need a bottle to tilt from 0 degrees to 65 degrees at a controlled speed. You may need a platform to rotate to a specific angle and stop.
Stepper motors are better for this because they are designed for controlled position and speed.
Stepper motors vs servo motors
Servo motors use feedback, usually from an encoder, to know their actual position. This makes them very accurate and powerful for many industrial applications.
But they are usually more expensive and more complex than basic stepper systems.
For most tabletop rigs, a stepper motor is enough. It is cheaper, easier to source and easier to understand. You can build useful sliders, pouring rigs, turntables and conveyor belts with standard stepper motors and drivers.
Servo systems can be useful later for heavier loads or high-precision industrial-style rigs, but they are not the best starting point for most food and product video work.
NEMA 17 vs NEMA 23
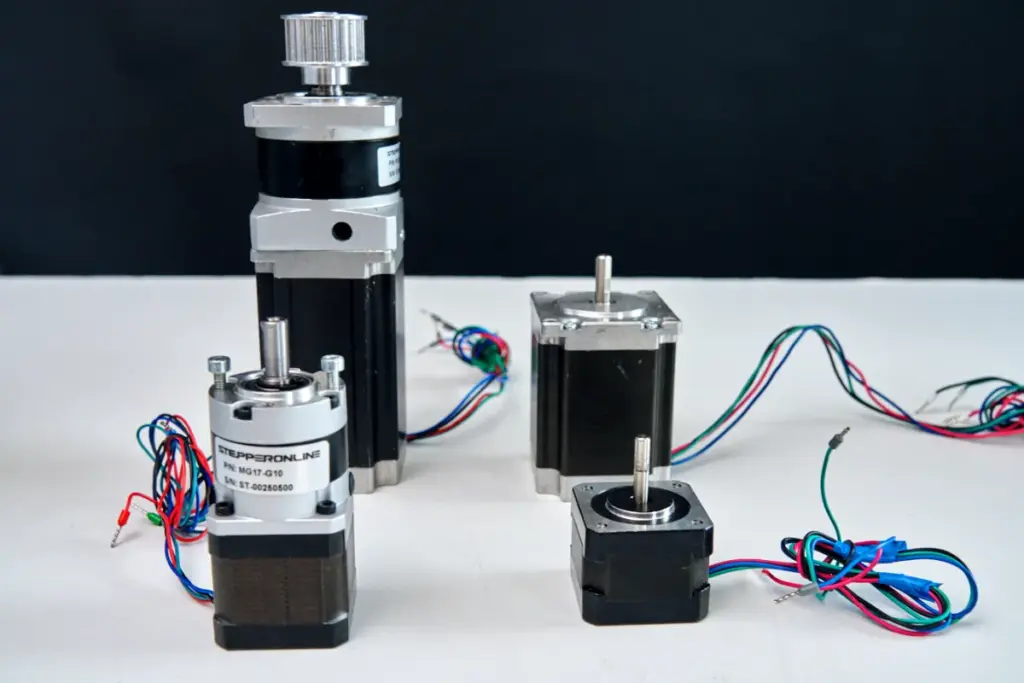
The two stepper motor sizes you will see most often in tabletop work are NEMA 17 and NEMA 23.
NEMA is a frame size standard. It does not directly tell you the motor power, but it tells you the physical faceplate size and mounting pattern.
NEMA 17
NEMA 17 motors have a 42 × 42 mm faceplate. They are small, affordable and widely available.
They are useful for:
- small motorized sliders
- light camera moves
- small product turntables
- light motorized pouring rigs
- small conveyor belts
- basic Arduino motion-control tests
For many beginner tabletop rigs, NEMA 17 is the right starting point. It is strong enough for lightweight movement and much easier to handle than a larger motor.
NEMA 23
NEMA 23 motors have a 57 × 57 mm faceplate. They are larger, heavier and usually provide more torque.
They are useful for:
- heavier camera sliders
- large bottle or pitcher pouring rigs
- stronger conveyor belts
- rigs with higher mechanical resistance
- setups where stalling would ruin the take
NEMA 23 is not automatically better. It is stronger, but it also needs more current, a stronger driver, a suitable power supply and better mechanical mounting.
The practical rule is simple: start with NEMA 17 unless you have a clear reason to move heavier loads. Move to NEMA 23 when the shot demands more torque.
For basic specifications and common stepper motor formats, manufacturer documentation from companies like StepperOnline can help you compare motor size, torque and wiring before buying parts.
What a stepper driver actually does
You cannot connect a stepper motor directly to a power supply and expect it to work properly.
The motor needs a driver.
The driver sits between the controller and the motor. The controller sends simple step and direction signals. The driver turns those signals into controlled power pulses for the motor coils.
In a motion-control setup, the chain usually looks like this:
- controller: Arduino, Mantis, Dragonframe or another system
- driver: for example DM542T, CL42T or CL57T
- motor: NEMA 17, NEMA 23 or another stepper
- power supply: usually 24 V or 48 V for the motor side
The driver is mandatory because stepper motors need controlled coil energizing. Without a driver, the motor will not move correctly and may be damaged.
DM542T, CL42T and CL57T
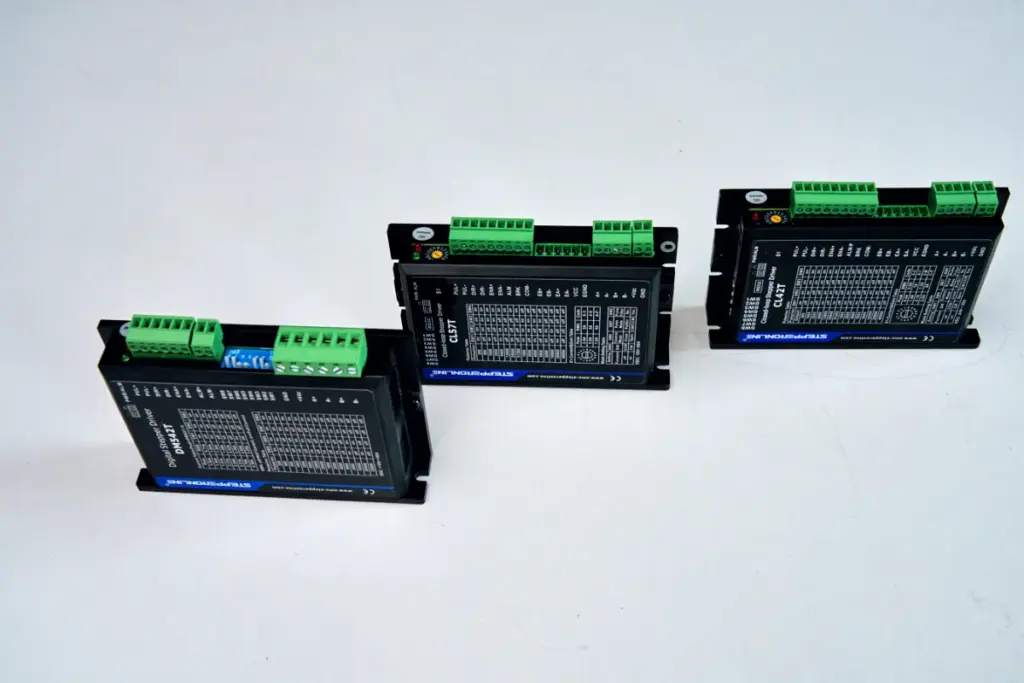
There are many stepper drivers, but these three names come up often in tabletop motion-control builds.
DM542T
The DM542T is a common digital stepper driver. It works well with many NEMA 17 motors and some smaller NEMA 23 motors.
It lets you set motor current and microstepping using DIP switches. It is affordable, easy to find and common in DIY builds.
For a first practical motion-control build, the DM542T is usually a good choice.
CL42T
The CL42T is a closed-loop driver for smaller stepper motors. Closed-loop systems use encoder feedback to detect position errors or missed steps.
This adds safety and reliability, but it also increases cost and complexity.
For beginner rigs, it is not always necessary. It becomes useful when missed steps would ruin a shot or when the load is less predictable.
CL57T
The CL57T is a closed-loop driver usually used with larger NEMA 23-style motors.
It is useful for heavier sliders, larger pouring rigs or motion systems where a stall cannot be accepted.
For a first build, start simpler unless you already know you need closed-loop control.
Current setting: the most important driver setup
The most important setting on a stepper driver is current.
The driver current must match the motor’s rated current. This rating is usually printed on the motor label or listed in the datasheet.
If current is too low, the motor is weak. It may stall, lose steps or fail to move under load.
If current is too high, the motor can overheat. Over time, that can damage the motor and make the system unreliable.
Most NEMA 17 motors are in the approximate range of 1.5 A to 2.5 A. Many NEMA 23 motors are higher, often around 2.8 A to 4.2 A or more, depending on the model.
The safe method is:
- read the motor label or datasheet
- find the rated current
- set the driver to that value or just below it
- test slowly first
- increase speed and load only after basic movement is stable
Do not guess the current setting. This is one of the easiest ways to create a weak or overheating system.
Microstepping in plain language
Microstepping divides each full motor step into smaller steps.
A typical stepper motor has 200 full steps per rotation. With microstepping, the driver can create smoother motion by dividing those steps into smaller increments.
For example:
- full step: 200 steps per rotation
- 1/8 microstepping: 1600 microsteps per rotation
- 1/16 microstepping: 3200 microsteps per rotation
Microstepping makes slow movement smoother, which is useful for camera sliders, pouring rigs and product motion.
But microstepping does not magically make the motor stronger. It mainly improves smoothness. Very high microstepping settings can reduce practical torque at each microstep and make the controller need to output more pulses.
For most tabletop rigs, 1/8 or 1/16 microstepping is a good starting point.
Power supplies: 12 V, 24 V and 48 V
Stepper motors and drivers usually use low-voltage DC power.
For beginner tabletop rigs, 24 V is often the best starting point. It gives better performance than 12 V for many motors and is still easy to source.
12 V
12 V can work for very small motors or simple low-power tests, but it may feel underpowered for many motion-control rigs.
24 V
24 V is a practical default for many NEMA 17 and smaller NEMA 23 setups. It gives better acceleration and smoother movement than many 12 V builds.
48 V
48 V is useful for larger motors, heavier loads and faster acceleration, especially with stronger NEMA 23 systems. Do not start with 48 V unless your motor and driver setup actually needs it.
5 V logic power
Controllers such as Arduino boards often use 5 V logic power. This is separate from motor power.
Do not confuse motor power with controller logic power. A motion-control setup may need one power supply for motors and another regulated supply for logic or controller electronics.
For most beginner builds, a 24 V motor supply and a separate 5 V logic supply are a clean starting point.
Wiring a 4-wire stepper motor
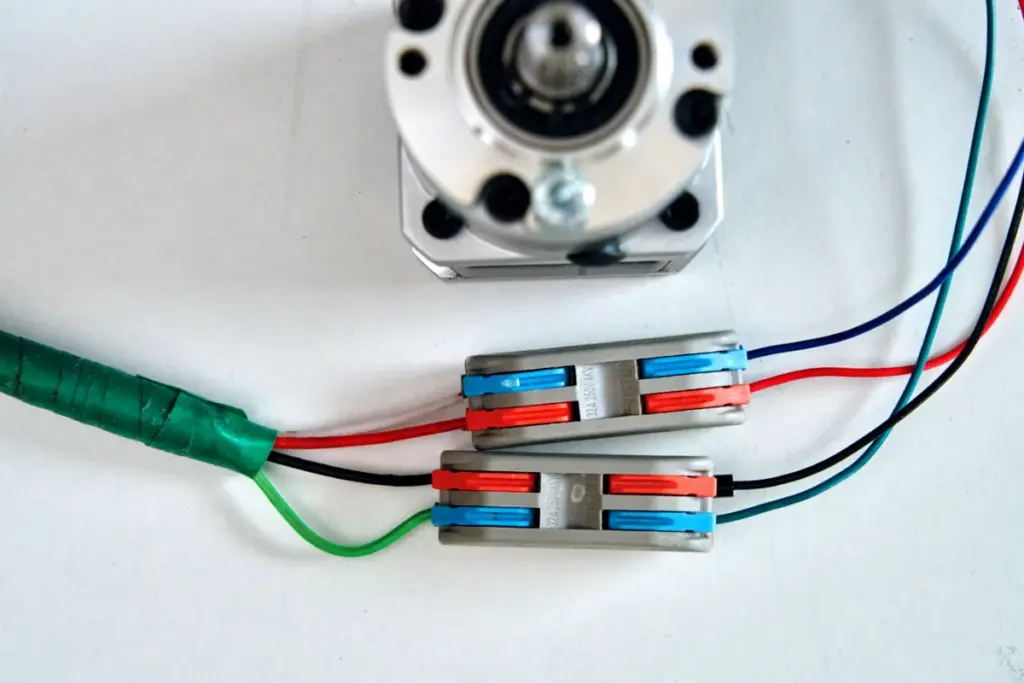
Most stepper motors used in tabletop rigs have four wires.
Those four wires are not simple plus and minus connections. They are two coil pairs.
The driver outputs are usually labeled:
- A+
- A-
- B+
- B-
One motor coil connects to A+ and A-. The other coil connects to B+ and B-.
Wire colors are not universal. One motor may use red and blue for one coil, while another brand may use different colors. Do not trust colors unless the datasheet confirms them.
The safe way is to use a multimeter. Two wires from the same coil will show low resistance or continuity. Wires from different coils will not.
Once you identify the two pairs, connect one pair to A+ and A-, and the other pair to B+ and B-.
Swapping A+ and A- usually only reverses direction. Mixing the two coil pairs incorrectly can make the motor vibrate, hum, stall or move unpredictably.
Turn power off before changing wiring
This rule is important.
Do not swap motor wires while the driver is powered.
Hot-swapping stepper motor wires can damage the driver, motor or both. Many stepper problems happen because someone changes wiring while the system is live.
Power off first. Wait a moment. Change wiring. Check the connections. Then power on again.
This is a simple habit that prevents expensive mistakes.
The XLR connector trick for cleaner rigs
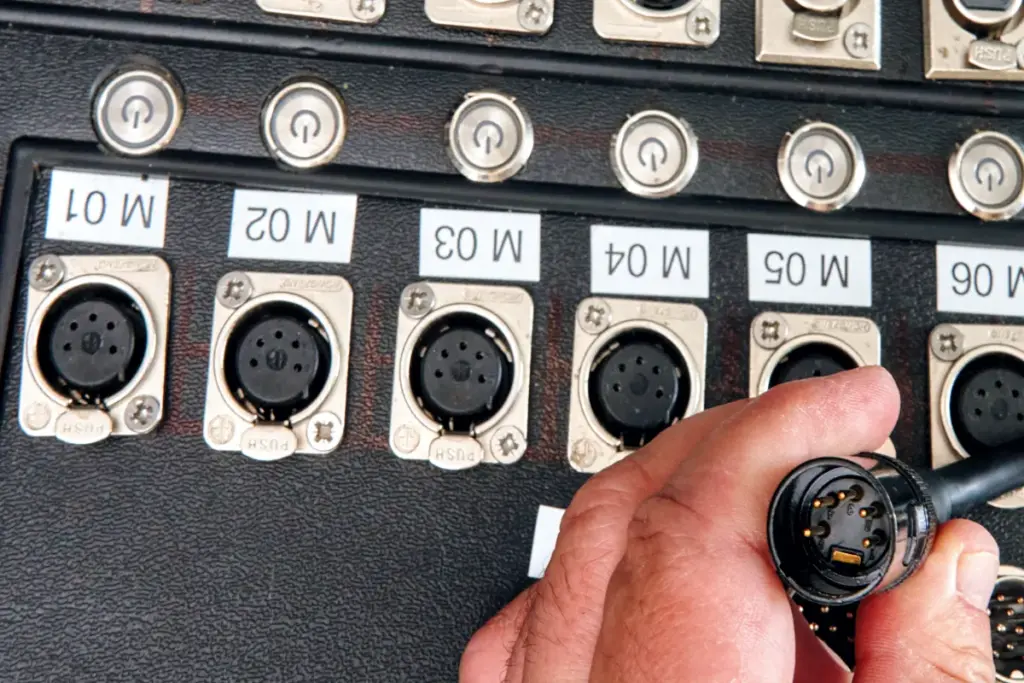
When you build one small rig, you can wire the motor directly.
When you build several rigs, cable management becomes much more important.
Many tabletop builders use 5-pin XLR connectors for stepper motor extensions. A 4-wire stepper needs four conductors, and a 5-pin XLR gives you those conductors plus one extra pin that can be unused, shield or ground depending on your system.
XLR connectors are strong, common, lock into place and are easy to unplug between setups.
Example 5-pin XLR pinout
- Pin 1: A+
- Pin 2: A-
- Pin 3: B+
- Pin 4: B-
- Pin 5: unused, shield or spare
This is not a universal standard. The important thing is that your own system is consistent. Use the same pinout on every cable, label both ends and document the wiring.
For triggers, buttons and solenoids, smaller connectors or 3-pin XLR can also be useful. WAGO-style connectors and ferrules can keep internal control-box wiring cleaner and more serviceable.
The goal is simple: make cables that you can connect quickly without guessing.
Common beginner problems
The motor hums but does not turn
This is often a wiring issue. The coil pairs may be mixed. Turn power off, identify coil pairs with a multimeter and reconnect them correctly.
The motor turns but stalls under load
The current may be too low, the motor may be too small, the acceleration may be too aggressive, or the mechanical load may be too high.
The motor gets too hot
The current may be set too high. Check the motor’s rated current and driver DIP switch settings.
The motion is rough at slow speed
Try 1/8 or 1/16 microstepping. Also check that the mechanical system is not binding.
The motor moves in the wrong direction
Swap one coil polarity or change direction in the controller settings. This is usually easy to fix.
FAQ
Can I use one power supply for multiple motors?
Yes, if the power supply has enough current capacity for the motors and drivers. Calculate conservatively and do not run the supply at its absolute limit.
Why is my motor humming but not turning?
The most common cause is incorrect coil wiring. Turn power off, use a multimeter to identify the two coil pairs, then connect them correctly to A+/A- and B+/B-.
Do I need closed-loop steppers?
Not for most beginner tabletop rigs. Open-loop steppers with a driver such as DM542T are enough for many sliders, turntables and pouring tests. Closed-loop becomes useful when missed steps would ruin the shot.
Can I run a stepper without microstepping?
Yes. Full-step mode works, but motion can look rough at slow speeds. For tabletop cinematography, 1/8 or 1/16 microstepping usually looks smoother.
What is the difference between a driver and a controller?
The driver powers the motor coils. The controller decides when to send step and direction signals. An Arduino, Mantis or Dragonframe setup can act as the controller. A DM542T or CL57T acts as the motor driver.
Where to go from here
If you are not sure whether you need motion control yet, start with the guide on when tabletop motion control actually makes sense.
For the bigger picture, read what tabletop rigging is and how motion control fits next to air and water rigs.
You can also see real tabletop rigging examples in the Rig Lab Academy work section.
Module 3 of Rig Lab Academy goes deeper into power supplies, motors, drivers, control box builds, wiring schemes, slider rigs, pouring rigs and conveyor belt setups. The waitlist is open.
A stepper motor tabletop setup becomes much easier when you stop treating the parts as mysterious electronics. Match the motor to the load, match the driver to the motor, set current correctly, wire the coils properly, and test slowly before building the final rig around it.