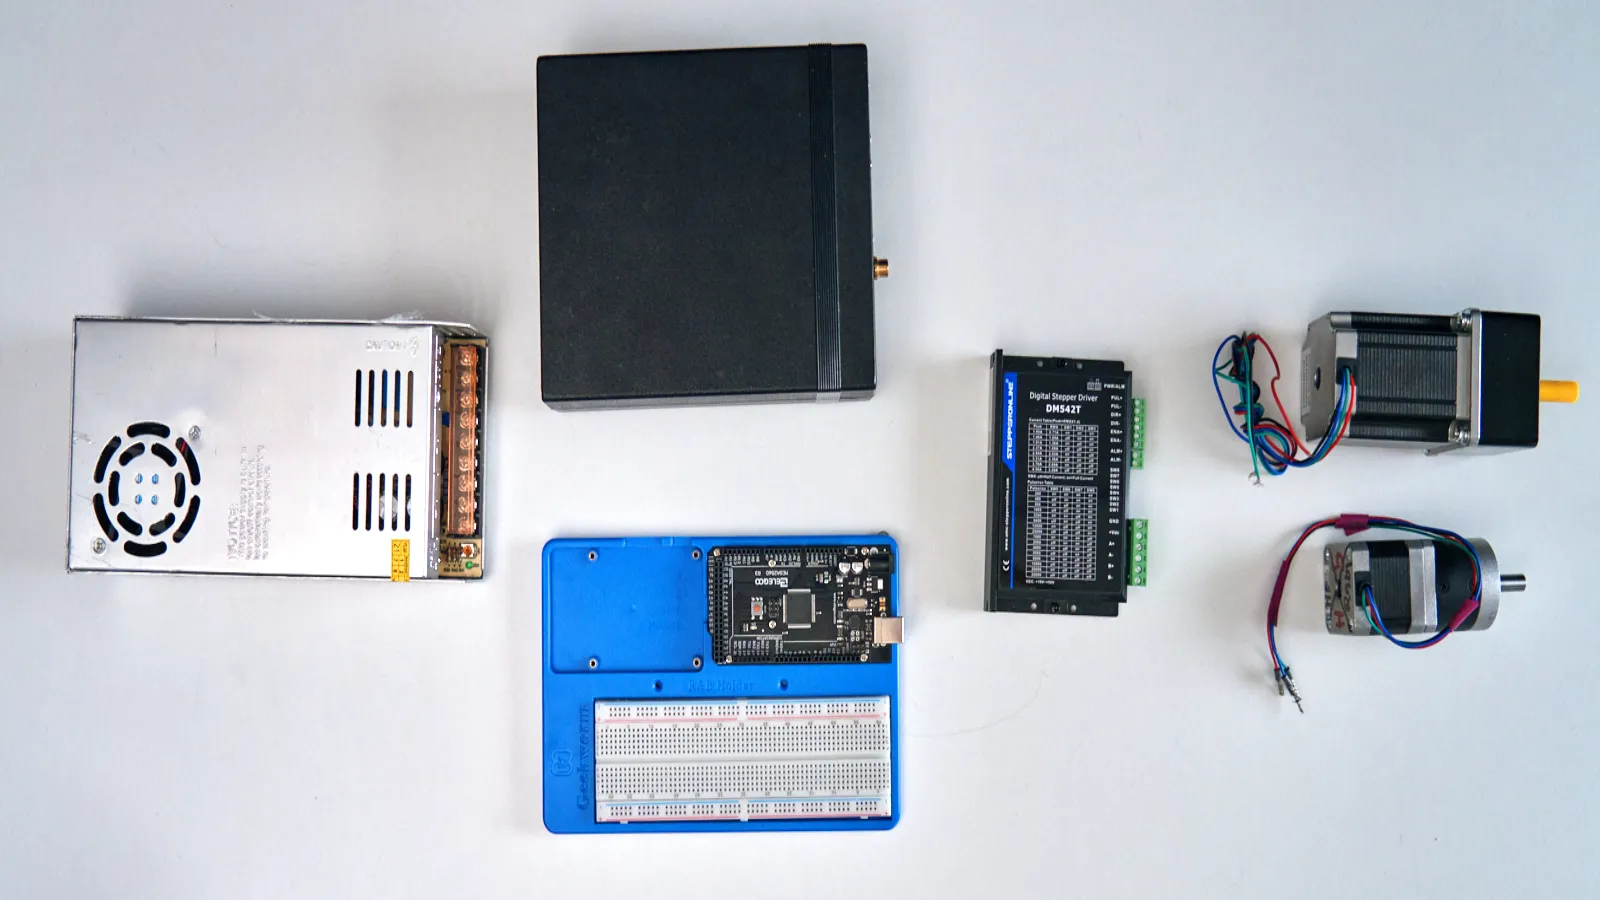
Motion control power supply: 12V, 24V or 48V?
A motion control power supply should match the motors, drivers, solenoids and controllers in the rig. The goal is not to buy the strongest supply, but to choose the correct voltage and enough current for the setup you actually use.
Many beginners start with the motor. They choose a NEMA 17, a NEMA 23, a DM542T driver, an Arduino board, a solenoid valve or a control box. Then they discover the real problem: nothing uses the same voltage, the power supply is too weak, the connectors do not match, and the cables become a mess.
This is where money gets wasted.
A good power setup makes every rig easier to build. A bad power setup creates random problems that look like motor problems, driver problems or code problems, even when the real issue is simply the wrong voltage or not enough current.
This guide explains the practical side: 12V, 24V, 48V, amps, watts, headroom, connectors, labels and why standardizing your rigging box saves time on every shoot.
Motion control power supply basics
Most tabletop motion-control rigs use low-voltage DC power.
That means the power supply plugs into normal wall power, but the output going to your rig is usually 12V, 24V or 48V DC. The rig itself should work from the low-voltage side.
For beginner builds, this is the safest and cleanest approach. You do not need to wire mains voltage directly inside your rig. Buy a proper certified power supply, plug it into the wall, and work only with the DC output side.
A typical tabletop motion-control setup may include:
- 24V power supply for stepper motors and drivers
- 12V power supply for solenoid valves or small accessories
- 5V supply for Arduino, sensors or logic electronics
- separate labeled cables for each voltage
- terminal blocks, connectors and fuses for cleaner wiring
The goal is not to have many power supplies. The goal is to have a clear system where every component gets the voltage and current it needs.
Voltage: 12V, 24V or 48V?
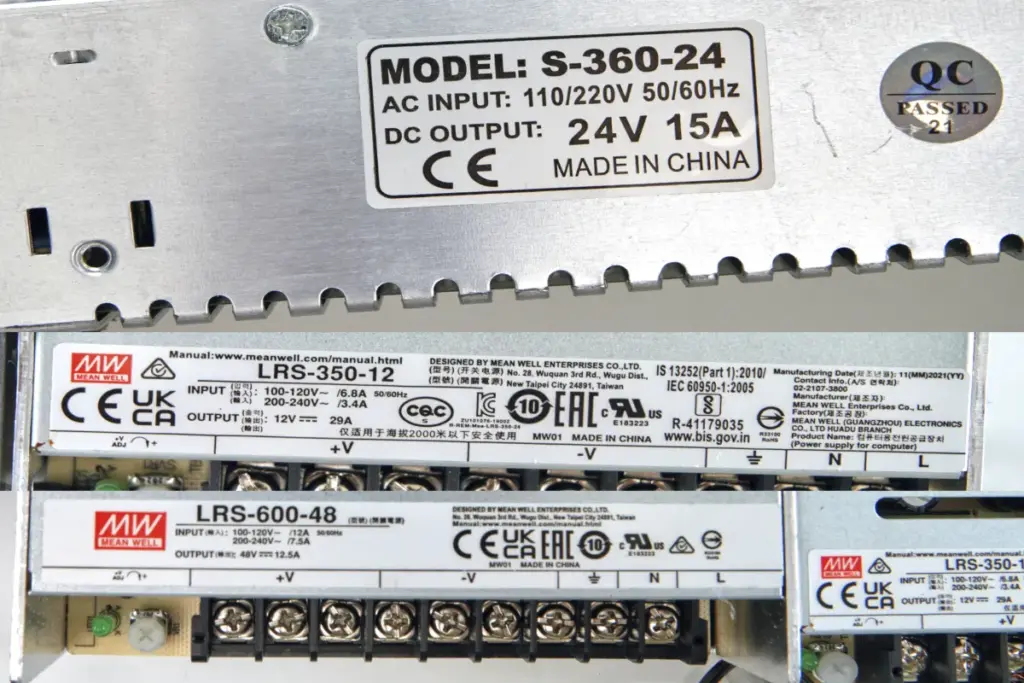
Voltage is the first number people notice.
A solenoid may be 12V. A stepper driver may work from 20V to 50V. A small controller may need 5V. A motor power supply might be 24V or 48V.
The mistake is thinking that higher voltage is always better. It is not. The correct voltage depends on the component and the job.
12V
12V is common for small accessories, solenoid valves, LED strips, relay modules and simple trigger systems.
It is easy to find power supplies, switches, cables and connectors for 12V. For simple pneumatic solenoid triggers, 12V is often a good beginner choice.
For stepper motors, 12V can work for very small tests, but it often feels weak for serious motion-control rigs. Acceleration and speed can be limited.
24V
24V is the best general starting point for many tabletop motion-control rigs.
It works well with many stepper drivers, many NEMA 17 motors and some smaller NEMA 23 setups. It gives better motor performance than 12V while still being easy to source and manage.
If you are building your first motorized slider, small conveyor belt, turntable or bottle tilt test, 24V is usually the most practical motor supply voltage.
48V
48V is useful for stronger motors, heavier loads and faster acceleration, especially with larger NEMA 23 systems.
It can improve performance when the driver and motor are designed for it, but it is not the first thing a beginner should buy. Higher voltage also means you need to be more careful with driver compatibility, wiring quality and enclosure layout.
Use 48V when the motor and driver setup specifically benefits from it, not because it sounds more professional.
Amps: how much current the rig can draw
Current is measured in amps. This tells you how much electrical flow the power supply can provide.
A power supply with too little current capacity will cause problems. Motors may stall, drivers may reset, solenoids may fire weakly, or the system may behave randomly under load.
A power supply with more current capacity than needed is usually fine. The components only draw what they need, as long as the voltage is correct.
This is an important point:
Voltage must match. Current capacity must be enough.
If a motor system needs 24V, use 24V. Do not connect it to 48V unless the driver and motor are rated for it. But if the system may draw 4A, using a 24V 8A supply gives comfortable headroom.
Watts: the simple calculation
Watts are power. The basic calculation is:
Watts = Volts × Amps
For example:
- 24V × 5A = 120W
- 24V × 10A = 240W
- 12V × 5A = 60W
- 48V × 5A = 240W
This helps you compare power supplies and understand what they can deliver.
If you have a 24V 10A power supply, it can provide up to 240W. That does not mean your rig always uses 240W. It means the supply has that capacity available.
For tabletop rigs, it is smart to leave headroom. Do not run a power supply at its absolute limit all the time. A supply that has 20–30% extra capacity will usually run cooler and more reliably.
Stepper motors and power supplies
Stepper motors do not connect directly to the power supply. They connect to a stepper driver, and the driver connects to the power supply.
The driver controls how current flows into the motor coils. This is why the driver current setting matters so much.
For many beginner tabletop motion-control builds, a 24V supply is enough. It can run a DM542T driver with a NEMA 17 motor for a slider, turntable, small pouring rig or conveyor belt.
For heavier NEMA 23 systems, 24V can still work in some cases, but 48V may give better performance if the driver supports it.
The important thing is to check the driver input voltage range. For example, many drivers support a range rather than one exact voltage. If the driver supports 20–50V DC, then both 24V and 48V may be possible. But the motor, load and application decide which makes sense.
Do not choose the power supply before choosing the driver and motor. These three parts must work together.
Solenoids, relays and 12V systems
Solenoid valves are common in pneumatic rigs, and many are available in 12V or 24V versions.
Both work. The important thing is consistency.
If your pneumatic solenoids are 12V, keep that system 12V. If you choose 24V solenoids, build around 24V. Do not mix random voltages unless you clearly label everything and have a reason.
A 12V solenoid connected to 24V can burn out. A 24V solenoid connected to 12V may not fire reliably.
This is why labels matter. Every power supply, solenoid, cable and trigger line should be clearly marked.
5V logic power
Controllers such as Arduino boards, sensors and some trigger electronics often use 5V logic power.
This is separate from motor power.
Do not assume that the 24V motor supply can directly power a 5V controller. You need a proper 5V supply or a voltage regulator designed for the job.
A clean setup often has:
- 24V for stepper drivers and motors
- 12V or 24V for solenoids
- 5V for controller logic
Keeping these rails separate makes troubleshooting easier. If the motor side has a problem, it does not automatically disturb the controller side.
One power supply or several?
You can run multiple motors from one power supply if the voltage is correct and the current capacity is high enough.
For example, one 24V 10A supply can run several small NEMA 17 motors in many tabletop setups, depending on driver settings and load.
But there are cases where separate supplies are cleaner:
- one supply for motors
- one supply for solenoids
- one small regulated supply for logic
- separate supplies when water rigs are near electronics
- separate supplies for testing unknown components
One big supply can be convenient. Several smaller supplies can make the system easier to isolate and debug.
For beginners, the best approach is simple: start with one 24V motor supply, one 12V supply if your solenoids need it, and one clean 5V logic supply.
Connectors and standardization
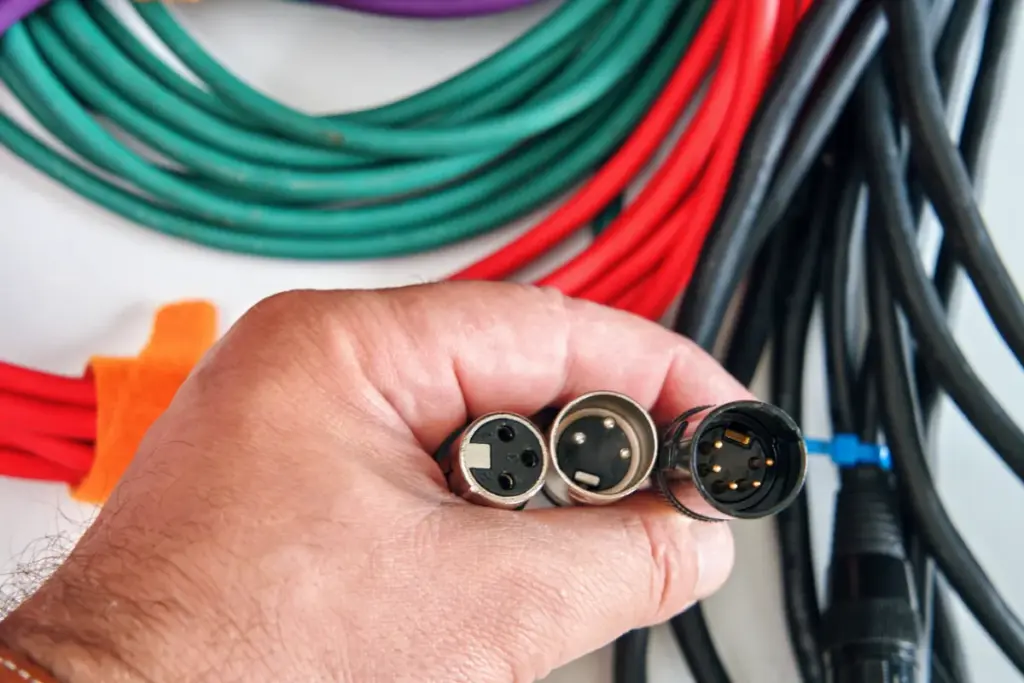
Power problems often become cable problems.
If every rig uses a different plug, different polarity, different cable length and different adapter, setup time becomes slow and mistakes become more likely.
A standardized connector system saves money and frustration.
You do not need the most expensive connectors. You need a system that is consistent, labeled and strong enough for repeated use.
Useful connector habits
- use one connector type for 12V
- use a different connector or clear label for 24V
- do not let 12V and 24V plugs look identical unless they are clearly labeled
- label both ends of every cable
- mark polarity clearly
- use strain relief where cables move
- avoid loose wires on set
XLR connectors can be useful for motor and trigger cables. WAGO-style lever connectors are useful inside control boxes. Ferrules make stranded wires cleaner in screw terminals. Terminal blocks keep wiring organized.
The exact connector choice matters less than using the same logic every time.
Fuses and basic protection
Small tabletop rigs are usually low voltage, but protection still matters.
A fuse or resettable breaker can protect the system if something shorts. This is especially useful in control boxes, motor rigs and setups that may be rebuilt often.
You do not need to overcomplicate the first build, but you should avoid direct messy wiring from power supply to random components with no protection and no structure.
Basic protection can include:
- fuse on the main DC output
- separate fused outputs for motors or accessories
- proper terminal blocks
- enclosure for exposed electronics
- clear on/off switch
- emergency stop for larger moving rigs
For a small test rig, this may sound excessive. But as soon as you add more motors, water rigs, solenoids or moving parts, clean power distribution becomes important.
Safety around mains power
Do not wire 220V mains inside a beginner tabletop rig.
Use a certified power supply that converts wall power to low-voltage DC. Work from the DC output side. Keep mains wiring inside the certified power supply enclosure where it belongs.
If you need a custom mains enclosure, switch, inlet or professional power distribution, get qualified help. There is no reason to risk unsafe mains wiring for a tabletop rig that can run from low-voltage DC.
Also keep power supplies and control boxes away from water rigs. If you combine motion control with water, place electronics on the opposite side of the table or elevated above any splash zone.
Common power mistakes
Buying the motor before the power system
The motor, driver and power supply work as a set. Buying one without checking the others can create compatibility problems.
Using the wrong voltage
A 12V component does not become better when connected to 24V. It may burn out. A 24V component connected to 12V may not work properly.
Not enough current
If the supply cannot provide enough current, motors may stall or drivers may behave unpredictably.
No labels
Unlabeled cables are one of the biggest causes of mistakes. Label voltage, polarity and destination.
Mixing water and electronics
Water rigs and motion-control electronics can work together, but the electronics need distance, elevation and protection.
A practical starter power setup
For a beginner tabletop motion-control kit, a practical starting setup could look like this:
- 24V DC power supply for stepper drivers
- 12V DC power supply if using 12V solenoids
- 5V regulated supply for controller logic
- terminal blocks for power distribution
- clearly labeled DC output cables
- one connector standard for motors
- one connector standard for triggers or solenoids
- basic fuse or protected output
- multimeter for checking voltage and continuity
- labels and heat shrink for cable marking
This kind of setup is not glamorous, but it makes every future rig easier.
Once your power system is standardized, you can reuse it for sliders, pouring rigs, conveyor belts, turntables, pneumatic triggers and mixed air-motion setups.
Testing workflow before connecting the rig
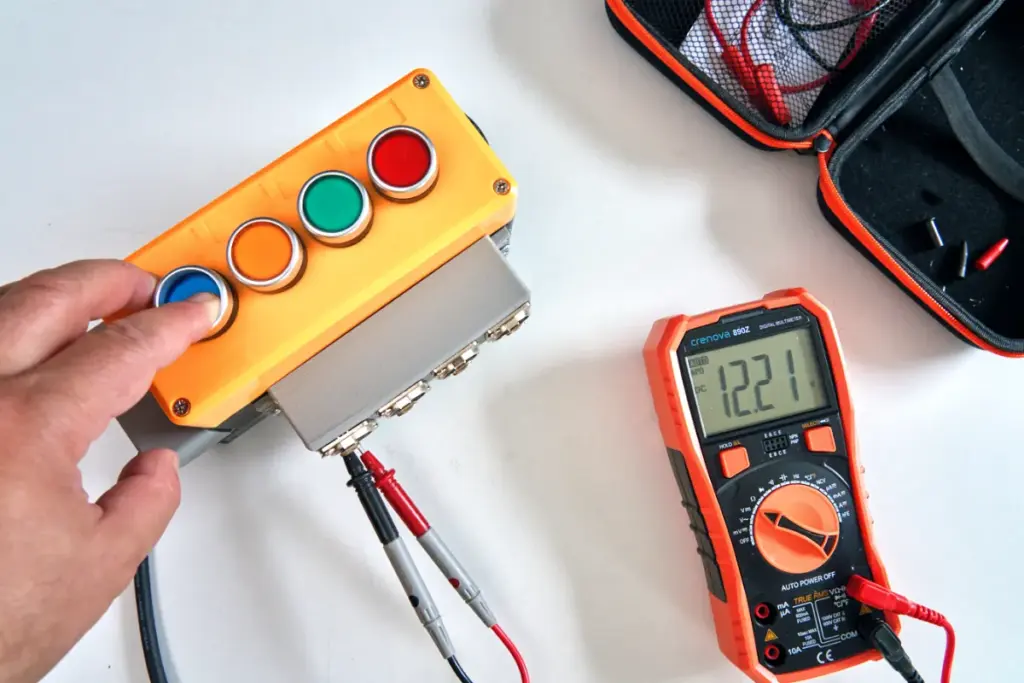
Before connecting motors, solenoids or controllers, test the power supply output with a multimeter.
Check:
- is the voltage correct?
- is polarity correct?
- are the labels correct?
- is the connector wired the way you expect?
- are there any loose wires?
Then test one component at a time.
Do not connect the full rig all at once and hope it works. Power the controller. Then the driver. Then the motor. Then the trigger. Then the full mechanism.
This makes problems easier to find.
FAQ
Is 24V the best starting voltage for motion control?
For many tabletop stepper motor rigs, yes. 24V is a practical starting point because it works with many drivers and motors while staying easy to manage.
Can I use one 24V power supply for multiple motors?
Yes, if the supply has enough current capacity. Add the expected current draw of the motors and leave headroom instead of running the supply at its limit.
Can I power Arduino from the motor supply?
Not directly. Arduino-style controllers usually need 5V or regulated input. Use a proper 5V supply or voltage regulator rather than connecting motor voltage directly.
Do I need 48V for NEMA 17 motors?
Usually not. Many NEMA 17 tabletop setups work well on 24V. Use 48V only when your driver, motor and application benefit from it.
What tool do I need before wiring anything?
A multimeter. It lets you check voltage, polarity, continuity and coil pairs. It is one of the cheapest tools that prevents expensive mistakes.
Where to go from here
If you are still deciding whether motion control is the right category for you, start with the guide on when tabletop motion control actually makes sense.
For the bigger picture, read what tabletop rigging is and how motion control fits next to air and water rigs.
You can also see real tabletop rigging examples in the Rig Lab Academy work section.
Module 3 of Rig Lab Academy goes deeper into power supplies, motor sizing, stepper drivers, control boxes, wiring standards, slider rigs, pouring rigs and conveyor belt builds. The waitlist is open.
A good motion control power supply setup is not about buying the biggest supply. It is about matching voltage, providing enough current, labeling everything clearly and building a system you can reuse without guessing every time.