Look at any high-end food commercial. Coffee pouring in slow motion. An apple bursting in mid-air. Spices colliding above a hot pan. The perfect splash as a strawberry hits a glass of milk. Almost none of that happens by accident. It happens because someone built a rig.
Tabletop rigging is the quiet craft behind those shots. It is what separates a clean, controlled, repeatable slow-motion moment from a chaotic mess where the food lands two centimeters off frame and the talent has to throw it again, and again, and again, until someone gives up.
I have been building rigs for slow-motion tabletop work for over a decade. Not as a hobby — as the thing I actually do, for actual commercials, for actual clients. And in that time I have noticed one thing: almost everything written online about this craft is either too vague to be useful or too technical to start with. So this guide is the version I wish I had when I was beginning.
If you have ever watched a slow-motion food shot and thought how did they do that, this is your starting point.
What tabletop rigging actually is
A tabletop rig is a small mechanical or electric setup you place on or near the table where you are shooting. Its job is to do something — release an object, push a splash of liquid, fire a burst of air, move the camera, time a precise action — at the exact moment you want it to happen.
That is the whole idea. Not magic. Not luck. Not throwing things from off-camera and hoping.
A good rig does three things.
It removes the human timing problem. You hit a button, or trigger the rig with a controller, or sync it to the camera. The action happens the same way, every take.
It removes the human alignment problem. Hands shake. Hands are different sizes. Hands appear in frame when you do not want them to. A rig does not have any of these problems.
It makes the shot repeatable. And repeatability is the difference between getting the shot in two takes and burning four hours of prep food trying to throw a tomato into a salad bowl correctly.
The slow-motion camera does not forgive. At 1000 frames per second, every tiny error is stretched across a long, slow, embarrassing moment. The rig is how you stop those errors from happening in the first place.
The three categories of tabletop rigs
Most rigs you will ever build fall into one of three categories. There is some overlap, but understanding these three buckets gives you a map for the whole craft.
Air rigs (pneumatic)
Air rigs use compressed air to make something happen fast. A small piston pushes, pulls, or rotates. A solenoid valve opens for a fraction of a second and releases a burst of air. That is the entire principle.
What you can do with air:
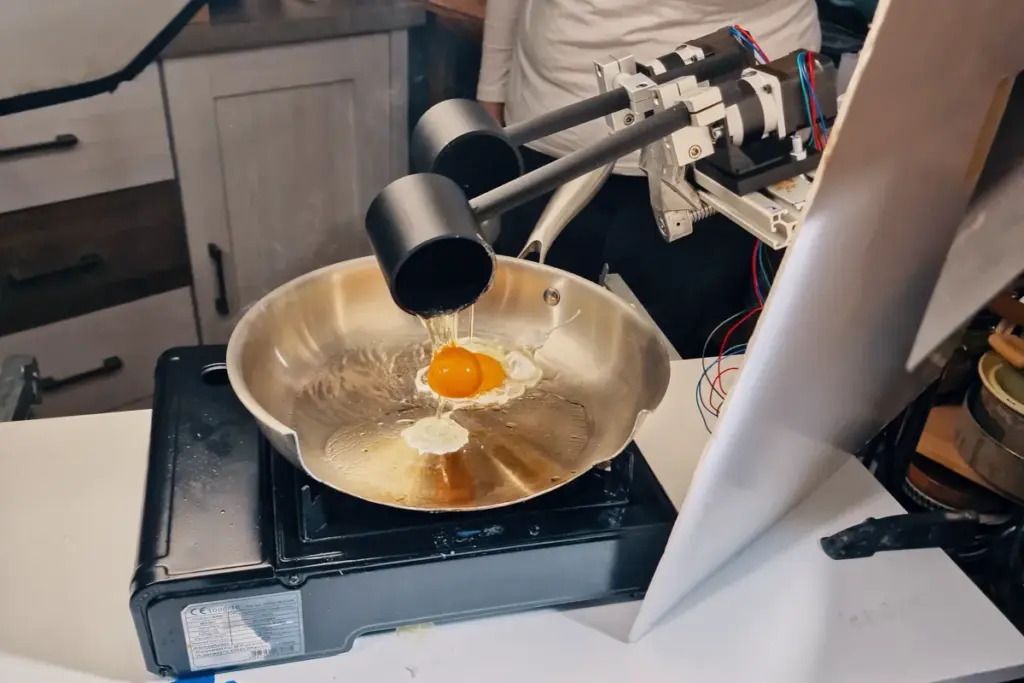
A pneumatic slide drop rig removes the support under an object. The object sits on a small plate or a set of rods. When the cylinder fires, that support moves away, and gravity does the rest. The food does not get thrown — it gets released, with frame-accurate timing. Use it for burger ingredients, eggs falling into a pan, butter onto bread, cheese into a bowl.
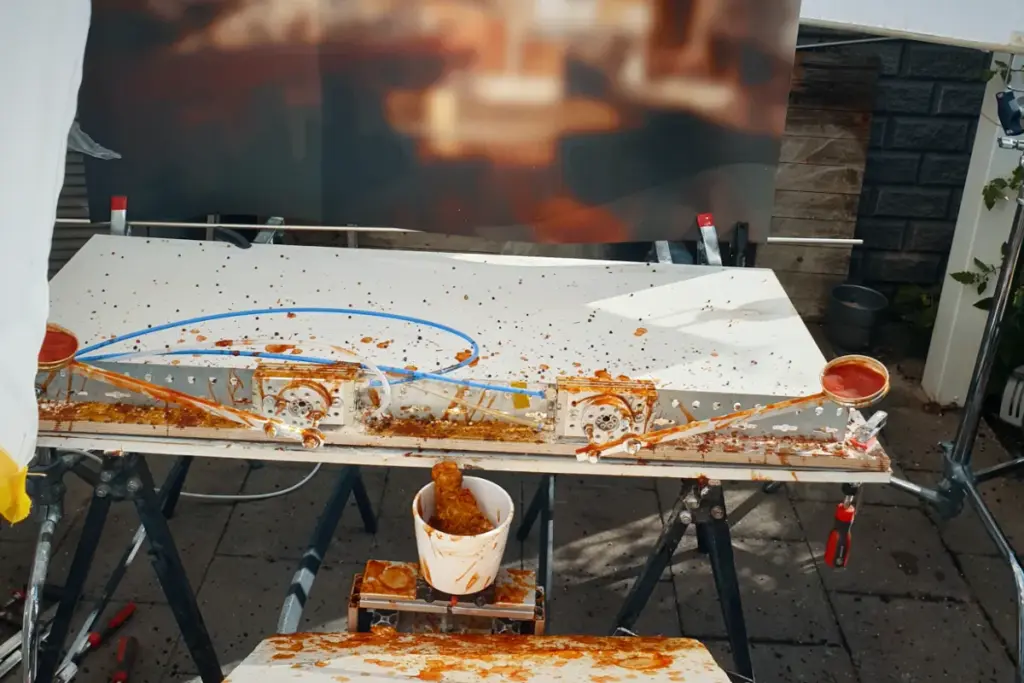
A launcher rig does the opposite: it pushes something into the frame. Two rotary cylinders with cup attachments can fire spices, powders, flour, cocoa, or cereal toward each other so they collide in mid-air. This is how you get those collision shots in spice and coffee commercials.
An impact burst rig uses a sudden release of air to detonate a powder, a pile of flour, confetti, or coffee grounds. The compressed air arrives from underneath or beside the subject and blows it outward.
Parts you will hear about repeatedly in air rigging: pneumatic cylinders (a common starting size is 20×200), solenoid valves, a small air compressor, 6 mm pneumatic hose, pressure regulators, M6 threaded rods, square aluminium profiles, and 3D-printed cups or holders. None of it is rare. Most of it is sourced from AliExpress, Amazon, or industrial pneumatics suppliers.
The key word in air rigging is pressure. Too little, the rig is weak and slow. Too much, it shakes the whole table and the camera with it. Half the craft is learning to dial it in.
Water rigs (liquid and splash)
Water rigs are everything involving liquid: splashes, pours, drops into liquid, fake boiling, bubbles, underwater shots, splashes from cut bottles. Liquid behaves badly. It leaks. It splashes where you do not want it. It ruins glass. It shorts out anything electric within a meter. That is why water rigs deserve their own category.
The starting point is not building a custom tank. It is grabbing a ready-made aquarium or a glass vase and shooting through it. Cheap aquariums have a slight greenish tint in the glass — fine for some shots, a real problem for clean beauty work, where you want low-iron or ultra-clear glass instead. That is one of the first lessons you learn. The container is part of your optical system, not just something that holds water.
Common water rigs you will eventually build:
A bubble rig — sometimes nothing more than an aquarium pump and an air stone — gives you bubbles for underwater backgrounds, fake boiling effects, or just texture in the shot. Most of these setups do not need a compressor. They need a small aquarium pump that costs less than a coffee.
A liquid tunnel or wave pour rig lets you create a controlled liquid pour with shape and direction you can repeat across takes.
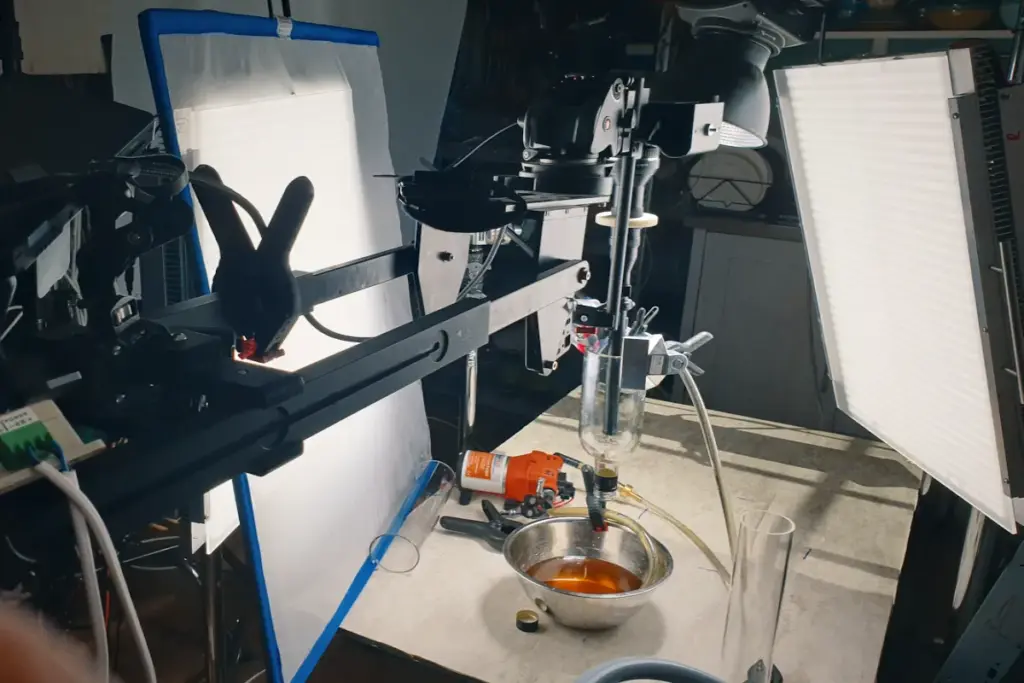
A pneumatic syringe splash rig uses a large 550 ml oil change syringe with a threaded front nozzle, driven by a pneumatic cylinder. Change the 3D-printed tip and you change the splash — narrow jet, wide jet, sheet-like splash, multiple thin streams. The pneumatic version exists for one reason: a human pushing the syringe by hand cannot repeat the timing. A cylinder can.
A cooking pot cutaway rig is a real metal cooking pot with the front cut open and a glass panel sealed in. The camera shoots through the glass, but the metal sides and back give the shot the look and feel of a real pot. That feeling — real kitchen, real cooking — is what an aquarium never gets you.
A bottle vortex rig cuts a bottle so the camera can shoot from inside it while a small pump circulates liquid around the inside walls. This is the classic beverage commercial trick.
The rule of water rigging: test with plain water first. Always. Never start a test with chocolate sauce or the brand’s hero liquid. You will need ten test pours before the rig is dialed in, and you do not want to burn through the client’s product.
Motion control rigs (electric and motorized)
Motion control is the third category, and it is where the rigs go from purely mechanical to electronic. Instead of one trigger releasing one cylinder, you now have motors, drivers, controllers, and software making things move on cue.
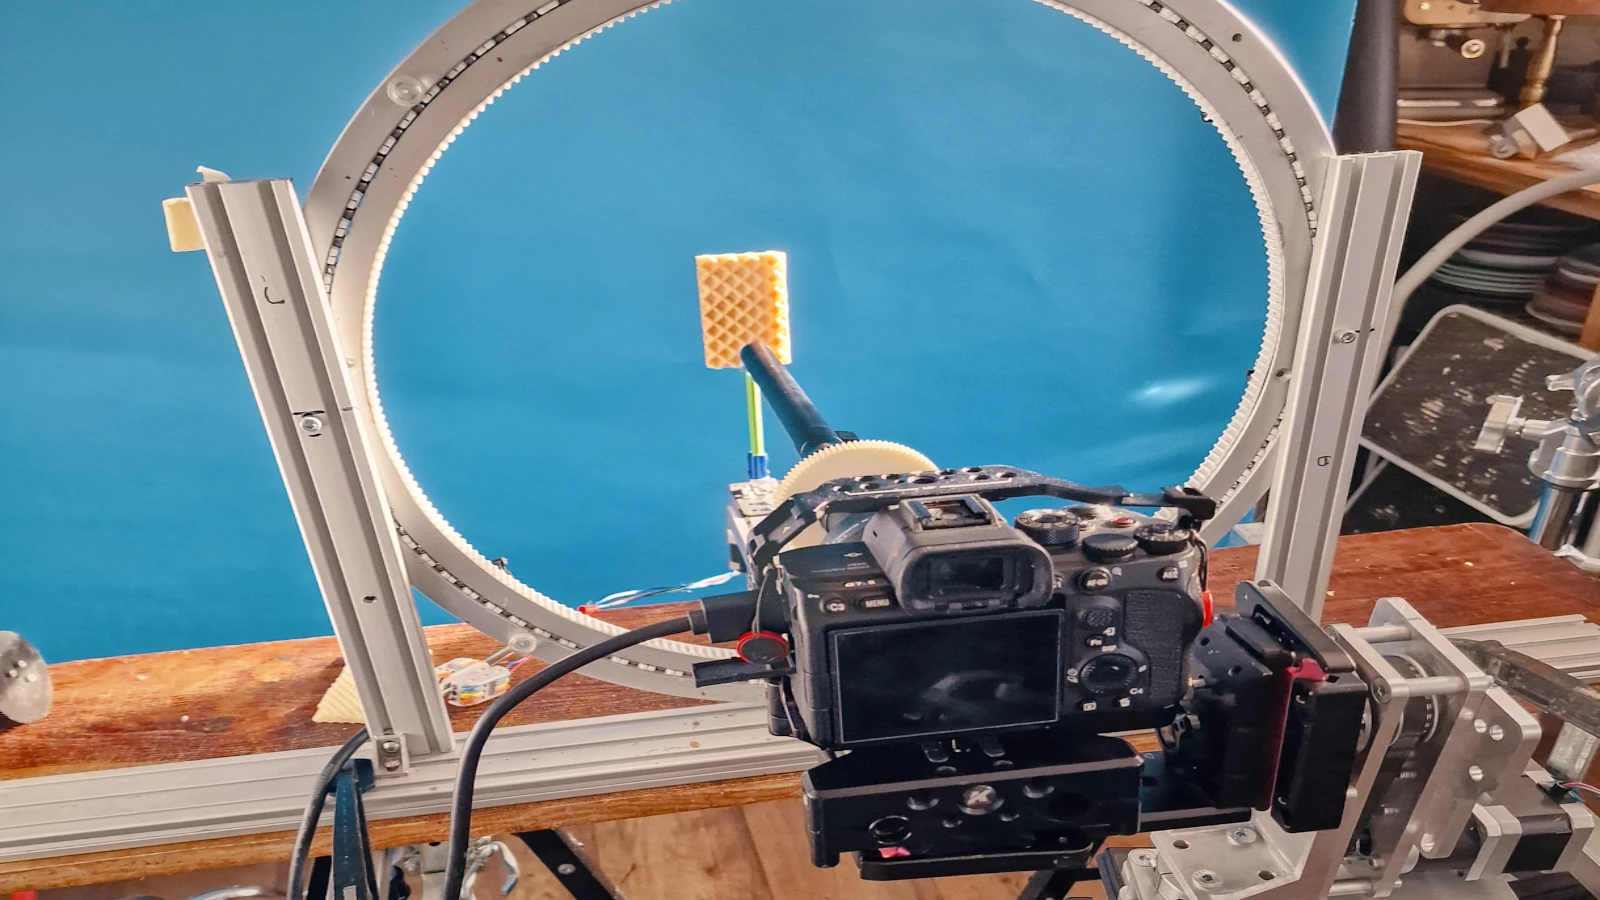
The simplest motion control rig is a motorized slider: a stepper motor pulls the camera along a track in a precise, repeatable move. Speed, distance, acceleration — all programmable. The camera move becomes part of the rig.
A motorized pouring rig uses a motor to tilt a bottle, pitcher, or container at a precise angle and rate. Pouring by hand is fine if the pour is generous and forgiving. For tight, hero, slow-motion pouring of a single drop or a perfect stream, motors win.
A conveyor belt rig moves objects through frame at a controlled speed. Useful for product reveals, ingredient lines, anything where the subject needs to glide past camera at exactly the speed you choose.
The parts world of motion control looks different from air rigs. You will encounter stepper motors (NEMA 17 and NEMA 23 are the common sizes), stepper drivers such as the DM542T or CL57T, 12 V or 24 V or 48 V power supplies, a 5 V supply for the logic side, XLR or aviation connectors for clean wiring, controllers like Mantis 2, Dragonframe for stop-motion workflows, or an Arduino for low-budget custom builds. A Pelican-style case becomes home base for the whole system so it travels without falling apart.
If air rigs are about pressure, motion control is about current and timing. Set the driver current wrong and the motor stalls or overheats. Get the timing wrong by three frames and the slider arrives at its end position after the action is over.
Why use a rig instead of throwing things by hand
This is the question I get most often. Why not just toss the food from off-camera?
You can. People do. Many beautiful slow-motion shots have been made by hand. But here is what happens on a real commercial day.
The director asks for a specific position in frame. You throw it. It lands two centimeters left. The director asks again. You throw it. It lands too high. After six tries, you have used most of the hero food, your assistant is exhausted, and on take eleven you finally get it — but the lighting has shifted because you have been at it for forty minutes.
A rig solves this in two takes.
There is also a quality difference. Hand-thrown food has a wobble. It rotates unpredictably. A rig releases the same way every time, so when you do get the right take, the next one can match it for editing.
And then there is what hand-throwing simply cannot do. You cannot hand-launch flour into the air at the exact moment a cinnamon stick lands, and have them collide above a coffee cup. You cannot manually time a splash to hit at the exact frame the spoon enters. Those shots require a rig.
Common mistakes beginners make
A short list, based on the mistakes I have made personally and watched many others make.
Starting with the most expensive parts. You do not need a Mantis 2 control system on day one. You do not need a NEMA 23 motor. Start with a single pneumatic cylinder, one solenoid, and a manual trigger button. Add complexity only when the simple version is genuinely not enough.
Skipping the water test. Every liquid rig should be tested with plain water before the real liquid touches it. Every time.
Building everything custom from day one. A ready-made aquarium beats a custom tank for your first ten water shots. A simple drop rig beats a motorized programmable platform for your first launch. Custom builds come later, when you know exactly what you need.
Ignoring repeatability. A rig that works once is a prop. A rig that works the same way ten times in a row is a tool. Big difference.
Not labeling cables. This sounds boring. It is not boring on the day when you have nine cables coming out of a control box and no idea which one is the trigger.
Using too much pressure. New builders almost always start with more air pressure than they need. The result: a violent rig that shakes the table and the camera. Start low. Add only if necessary. A regulator between the compressor and the solenoid is not optional — it is the most important safety part in a pneumatic rig.
Mixing water and electricity. Water rigs and electrical equipment do not belong on the same side of the set. Keep power supplies, cameras, and lights elevated and away from the water zone. This is the one rule with zero exceptions.
What you don’t need to buy first
This list is shorter than the what to buy list, but it might save you more money.
You do not need a Mantis 2 controller to start. A manual button and a solenoid will get you through your first three rigs.
You do not need a NEMA 23 stepper for your first motion-control rig. A NEMA 17 is enough.
You do not need a custom-built aquarium. A small ready-made one works for everything in your first month.
You do not need a high-end pneumatic compressor. A small 24-litre compressor is fine for almost every rig in the foundation modules.
You do not need 48 V power supplies. Most things in tabletop motion control run on 24 V. Some on 12 V. Buy 48 V only when you have a motor that specifically asks for it.
The shortest version of this list: do not buy the biggest version of anything until you have built three rigs at the smallest version.
How to start without spending a fortune
If you are starting from zero, here is a practical first month. You do not need to follow this exact order, but this is roughly what gets you to your first real shot.
Get a small ready-made aquarium and shoot a product drop into water. Test lighting. Test backgrounds. Notice how the glass affects the image.
Buy one small pneumatic cylinder (20×200 is a good first size), one solenoid valve, a small compressor, and a simple manual trigger button. Build a single-cylinder slide drop rig. Drop a piece of food into a bowl. Notice how much more control you have than throwing by hand.
Buy a small aquarium pump and an air stone. Build a bubble rig. Try fake boiling. Try underwater backgrounds.
That is three rigs across two categories. None of it costs more than a single mid-range lens. And by the end, you understand the principles well enough to plan your fourth and fifth rigs intentionally.
Motion control comes after, when you know which kind of movement you actually need. Buying a motion-control system before knowing what to control with it is the most common waste of money in this field.
FAQ
Do I need to be an engineer to build tabletop rigs?
No. You need to be patient and willing to test. Most rigs in this field are built by cinematographers and food stylists, not engineers. The parts come from off-the-shelf sources. The skill is in the combination, not in the parts.
Is tabletop rigging only for food and drinks?
No. The same principles apply to cosmetics, jewelry, small product launches, perfume bottles, and miniature sets. Food and beverage is where the demand is highest, but the techniques transfer.
Can I do this without a high-speed camera?
You can build the rigs without one, yes. But the value of the rigs is most visible in slow motion. If you are serious, you will eventually need a camera capable of at least 240 frames per second. Many of the principles still apply at lower frame rates, especially for controlled action and product reveals.
How long does it take to learn?
A month gets you the basics of one category. A year gets you all three at a working level. A decade gets you the instinct for which rig to use without thinking about it.
Where do I get the parts?
Most parts come from AliExpress, Amazon, eBay, and industrial pneumatics or electronics suppliers. The full course covers specific sourcing for each rig, with notes on what is worth buying new and what is worth waiting for.
Where to go from here
The full Rig Lab Academy course covers each of these rig categories in detail — builds, sourcing guidance, calibration, and selected files where available — from the workbench where they are actually used. The first cohort opens in October. The waitlist is open now.
If you want to see the kind of work these rigs produce, the work section of this site has examples.
If you are ready to build, the waitlist is your next step.